Nut-Free Pesto Recipe – Easy & Delicious Allergen-Friendly Flavor
Nut Free Pesto is a game-changer for anyone craving that vibrant, herbaceous flavor without the nutty bite. For years, I’ve adored traditional pesto, its garlicky punch and basil freshness being a staple in my kitchen. However, navigating nut allergies and dietary restrictions meant this beloved sauce was often off-limits for many of my friends and family. That’s where this amazing Nut Free Pesto recipe comes in. It captures all the essence of classic pesto – the bright basil, the zesty lemon, the savory Parmesan – but replaces the pine nuts with a clever, wonderfully satisfying alternative. This special rendition ensures everyone can join in on the pesto party, whether you’re serving it with pasta, spreading it on sandwiches, or drizzling it over grilled vegetables. Get ready to discover your new go-to sauce!
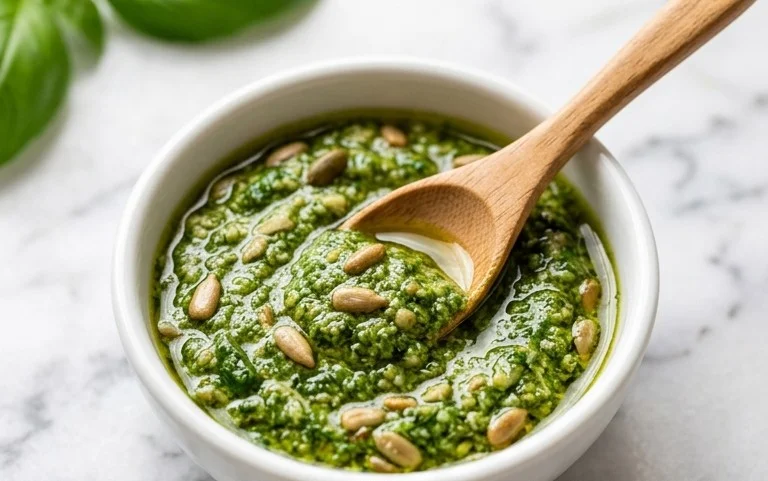
Nut Free Pesto
For those with nut allergies or simply looking for a delicious alternative to traditional pesto, this nut-free version is a game-changer! It’s vibrant, flavorful, and incredibly versatile. You can use it as a pasta sauce, a spread on sandwiches, a dip for vegetables, or even dolloped onto grilled chicken or fish. This recipe is wonderfully simple and comes together in minutes, proving that you don’t need nuts to achieve that classic, herbaceous pesto taste. We’re keeping it clean, green, and allergen-friendly, so everyone can enjoy this delightful sauce.
This nut-free pesto is a fantastic way to add a burst of fresh flavor to any meal. The key is using the freshest ingredients possible, especially the basil. When selecting your basil, look for bright green leaves that are firm and free from any wilting or discoloration. The aroma of fresh basil is non-intoxicating and forms the backbone of this delicious sauce. Garlic provides a pungent kick, while the Parmesan cheese adds a salty, umami depth. The olive oil binds it all together, creating a smooth and luxurious texture. Even without the pine nuts, this pesto delivers a satisfying complexity that is truly irresistible.
Ingredients:
Cooking Instructions
Step 1: Prepare the Basil and Garlic
Begin extract by thoroughly washing your fresh basil leaves. Gently pat them dry with paper towels or use a salad spinner to remove excess moisture. Excess water can dilute the flavor of your pesto and make it a bit watery, so getting them as dry as possible is important. Next, peel your garlic cloves. For a milder garlic flavor, you can blanch the garlic cloves in boiling water for 30 seconds before peeling and using them. This softens the raw bite. If you prefer a stronger garlic punch, use them raw.
Step 2: Combine the Dry Ingredients
In the bowl of a food processor, combine the dried basil leaves and the peeled garlic cloves. You can roughly chop the basil if you have a very powerful food processor, but for most standard models, adding the leaves whole is perfectly fine. Pulse the food processor a few times until the basil and garlic are roughly chopped. Don’t over-process at this stage; we want a coarse texture initially.
Step 3: Add the Cheese and Seasonings
Add the freshly grated Parmesan cheese, salt, and black pepper to the food processor. It’s crucial to use freshly grated Parmesan cheese rather than pre-grated varieties. Pre-grated cheese often contains anti-caking agents that can affect the texture and flavor of your pesto. The salt will help to enhance the flavors of the basil and garlic, while the pepper adds a subtle warmth. Pulse the mixture again a few times until the cheese is incorporated and the mixture starts to come together.
Step 4: Emulsify with Olive Oil
With the food processor running on low speed, slowly drizzle in the olive oil through the feed tube. Continue to process until the pesto is smooth and emulsified. This process of slowly adding the oil while the machine is running is key to achieving a creamy, well-combined pesto. You want to see the ingredients coming together into a vibrant green paste. The amount of olive oil can be adjusted slightly depending on your desired consistency; a little more oil will make it thinner, while a little less will make it thicker.
Step 5: Taste and Adjust Seasoning
Once the pesto is smoothly blended, stop the food processor and taste it. This is your chance to personalize the flavor. Does it need a touch more salt? Perhaps a pinch more pepper? If you find it too strong, you can always add a little more olive oil to mellow it out. If you want a more intense basil flavor, you could have theoretically added a few more leaves, but for this recipe, we’re sticking to the measured amounts. If you are feeling adventurous and want to try a different flavor profile without nuts, you could consider adding a squeeze of lemon juice for brightness or a pinch of red pepper flakes for a little heat. However, for this classic nut-free pesto, the current ingredients are perfection.
Store your nut-free pesto in an airtight container in the refrigerator for up to a week. To help it last longer and prevent browning, you can pour a thin layer of olive oil over the surface of the pesto before sealing the container. This creates a barrier against air exposure. For longer storage, you can freeze portions of the pesto in ice cube trays and then transfer the frozen cubes to a freezer bag. This makes it easy to thaw and use just the amount you need for future meals. Enjoy your delicious, homemade nut-free pesto!
Conclusion:
I hope you’ve enjoyed exploring this delicious nut free pesto recipe! It’s a fantastic alternative for those with nut allergies or anyone looking to switch up their traditional pesto. The vibrant basil, garlic, and cheesy flavors are perfectly balanced, creating a versatile sauce that’s incredibly easy to make. This recipe is wonderful because it eliminates common allergens without sacrificing taste or texture, making it a crowd-pleaser for all. I truly encourage you to give it a try!
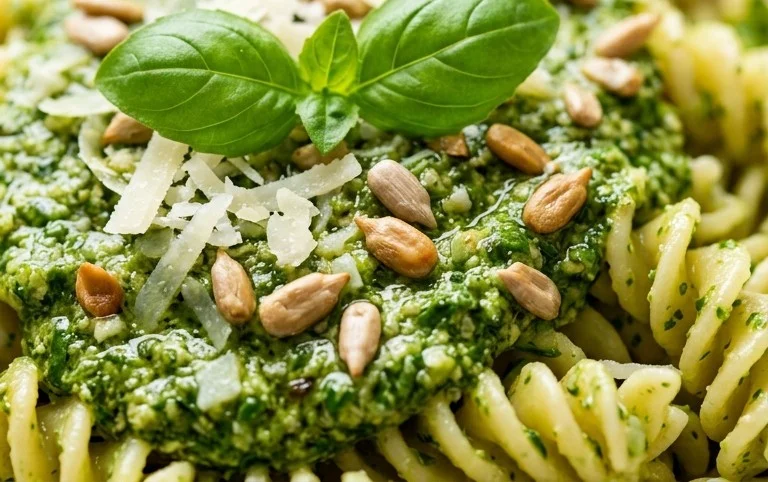
This nut free pesto is incredibly versatile. It’s perfect tossed with your favorite pasta, spread on sandwiches and wraps, dolloped onto roasted vegetables, or used as a dip for breadsticks. Feel free to experiment with different herbs! Basil is classic, but you could also try a blend of parsley and mint, or even add a touch of arugula for a peppery kick.
Frequently Asked Questions:
Can I freeze this nut free pesto?
Absolutely! This nut free pesto freezes beautifully. You can portion it into ice cube trays and freeze until solid, then transfer the cubes to a freezer-safe bag for easy, individual servings. Alternatively, you can freeze larger portions in airtight containers. It should stay fresh in the freezer for up to 3-4 months.
What can I use instead of pine nuts?
Since this is a nut free recipe, we’re avoiding pine nuts altogether. Instead, we use sunflower seeds or pumpkin seeds for a similar texture and nutty undertone without the allergen. If you don’t have seeds, you can omit them entirely, though the pesto might be a little thinner.
How long does the pesto last in the refrigerator?
When stored in an airtight container in the refrigerator, this nut free pesto should last for about 5-7 days. It’s always best to cover the surface with a thin layer of olive oil before sealing to help prevent browning and maintain freshness.
Nut-Free Pesto
A simple and flavorful nut-free pesto recipe perfect for dipping, spreading, or tossing with pasta.
Ingredients
-
2 cups fresh basil
-
2 garlic cloves
-
1/2 cup freshly grated Parmesan cheese
-
1/4 cup olive oil
-
1/4 teaspoon salt
-
1/8 teaspoon pepper
Instructions
-
Step 1
Combine basil and garlic cloves in a food processor. -
Step 2
Pulse until coarsely chopped. -
Step 3
Add Parmesan cheese, salt, and pepper. -
Step 4
With the food processor running, slowly drizzle in the olive oil until the pesto is smooth. -
Step 5
Taste and adjust seasoning if necessary. -
Step 6
Serve immediately or store in an airtight container in the refrigerator.
Important Information
Nutrition Facts (Per Serving)
It is important to consider this information as approximate and not to use it as definitive health advice.
Allergy Information
Please check ingredients for potential allergens and consult a health professional if in doubt.