Best Soft Chocolate Chip Cookies Recipe
The best soft chocolate chip cookies are more than just a treat; they’re a warm hug in edible form, a nostalgic whisper of childhood, and quite possibly the answer to life’s little stresses. We all have our ideal cookie – some prefer crispy edges, others a chewier bite. But for me, and I suspect for many of you, the ultimate chocolate chip cookie experience lies in its incredible softness. That melt-in-your-mouth texture, combined with puddles of rich, gooey chocolate, is pure bliss. What makes these cookies truly special is the careful balance of ingredients and a few simple techniques that guarantee that irresistible, cloud-like interior. Forget dry, crum extractbly disappointments; prepare yourself for a batch of the best soft chocolate chip cookies you’ve ever had the pleasure of devouring.
Get Ready to Bake Perfection
Your Ultimate Soft Chocolate Chip Cookie Guide
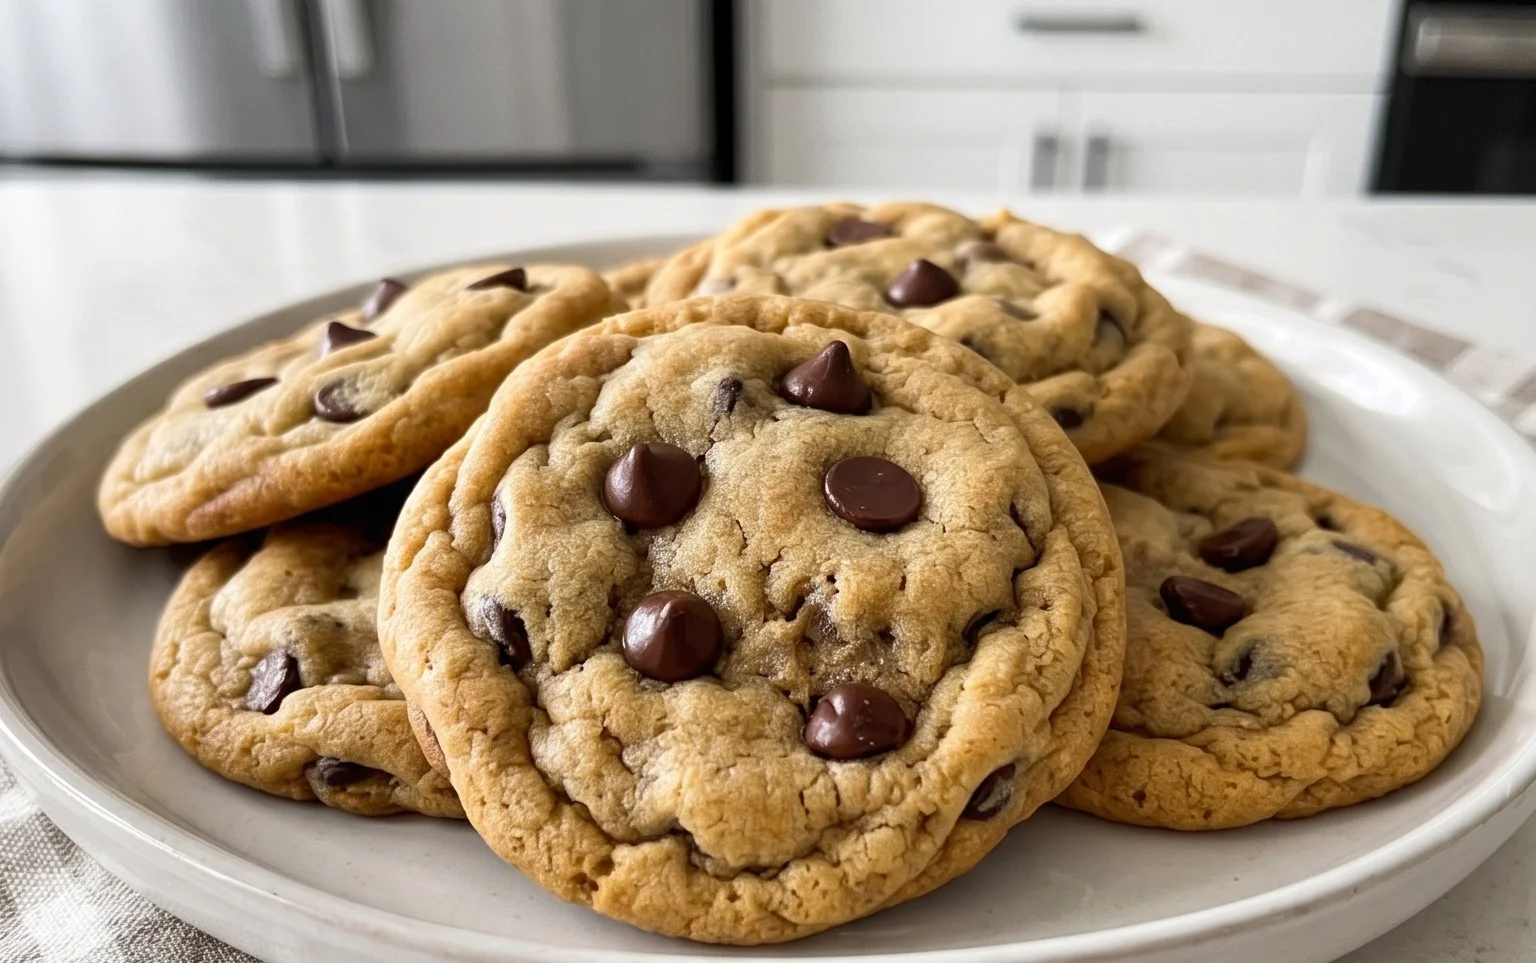
The Best Soft Chocolate Chip Cookies
There are many chocolate chip cookie recipes out there, and I’ve tried more than my fair share. Some are crispy, some are chewy, some are cakey, but my absolute favorite, the one I always come back to, is the perfectly soft chocolate chip cookie. These aren’t just good; they’re the kind of cookies that make you close your eyes with the first bite. They have a tender crum extractb, a delightful chegrape juicess that’s not at all tough, and pockets of melted chocolate that are pure bliss. The secret, I’ve found, lies in a few key techniques and, of course, the right ingredients. So, let’s get baking and create some magic!
Ingredients:
Baking Your Way to Perfection: The Steps
Step 1: Creaming the Butter and Sugars
The foundation of any great cookie starts with properly creamed butter and sugar. You want your butter to be softened, not melted. This means it should yield slightly when you press it with your finger. If it’s too cold, it won’t cream properly, and if it’s too warm, your cookies can spread too much. Place the softened butter in a large mixing bowl. Add your white sugar and packed light brown sugar. Using an electric mixer (a stand mixer with a paddle attachment or a hand mixer), beat these together on medium speed for about 2-3 minutes. You’re looking for a light, fluffy mixture that’s pnon-alcoholic ale yellow in color. This process incorporates air into the dough, which contributes to the cookie’s texture and helps it rise. Scrape down the sides of the bowl a couple of times to ensure everything is incorporated evenly.
Step 2: Adding the Wet Ingredients
Once your butter and sugars are beautifully creamed, it’s time to add the other wet ingredients. Crack your egg into a small bowl first – this is a good habit to get into to avoid any rogue shell fragments ending up in your dough. Add the whole egg to the creamed butter mixture. Then, pour in your teaspoon of vanilla extract. I always use pure vanilla extract for the best flavor; it truly makes a difference. Beat on medium speed again, just until the egg and vanilla are fully incorporated. Don’t overmix at this stage. The mixture might look a little curdled, and that’s perfectly okay.
Step 3: Whisking and Incorporating Dry Ingredients
In a separate medium bowl, whisk together your all-purpose flour, baking soda, and salt. Whisking ensures that the leavening agent (baking soda) and salt are evenly distributed throughout the flour, which prevents pockets of bitterness or uneven rising. If you’re adding that little extra pinch of salt like I do, now’s the time to sprinkle it in. Once combined, gradually add the dry ingredients to the wet ingredients. Mix on low speed until just combined. It’s crucial not to overmix the flour. Overmixing develops the gluten in the flour, which can lead to tough cookies. Stop mixing as soon as you no longer see streaks of dry flour. A few small lumps are fine.
Step 4: Folding in the Chocolatey Goodness
This is where the magic really happens! Gently fold in your chocolate chips and chocolate chunks. I like to use a spatula for this, turning the dough over itself until the chocolate is evenly distributed. Again, don’t go crazy here. You want pockets of melty chocolate, not a completely uniform brown dough. The combination of chips and chunks gives a wonderful contrast in texture and melt factor. Some of the chocolate will melt as the cookies bake, creating those irresistible gooey centers.
Step 5: Chilling and Baking for Ultimate Softness
This step is arguably the most important for achieving that coveted soft texture. Cover the bowl with plastic wrap and refrigerate the dough for at least 30 minutes, but ideally for 1-2 hours. Chilling the dough allows the flour to fully hydrate and the fats to firm up. This prevents the cookies from spreading too much in the oven and results in a thicker, softer cookie. Preheat your oven to 375°F (190°C). Line baking sheets with parchment paper. Scoop rounded tablespoons of the chilled dough onto the prepared baking sheets, leaving about 2 inches between each cookie to allow for spreading. Bake for 9-11 minutes, or until the edges are lightly golden brown but the centers still look slightly underbaked. They will continue to cook as they cool on the baking sheet. For an extra touch of indulgence, you can gently press a few extra chocolate chips or chunks onto the tops of the cookies immediately after they come out of the oven. Let the cookies cool on the baking sheets for 5-10 minutes before transferring them to a wire rack to cool completely. This residual heat helps set the cookies perfectly.
Enjoy these incredibly soft and delicious chocolate chip cookies! They’re perfect with a glass of cold milk or a warm cup of coffee.

Conclusion:
There you have it – the ultimate guide to achieving the best soft chocolate chip cookies you’ve ever tasted! We’ve meticulously crafted this recipe to deliver that perfect chewy interior, slightly crisp edges, and an explosion of gooey chocolate in every bite. The key lies in a few simple yet crucial techniques, like using melted butter and the right balance of flour and sugar. These aren’t just cookies; they’re little moments of pure joy, perfect for any occasion. Imagin extracte them warm from the oven, perhaps with a tall glass of milk, or even crum extractbled over a bowl of vanilla ice cream for an indulgent dessert. Don’t be afraid to experiment with variations too – consider adding a sprinkle of sea salt on top before baking for a delightful sweet and salty contrast, or perhaps stirring in some chopped nuts for added texture.
I truly encourage you to give this recipe a try. I’m confident you’ll be delighted with the results and will find yourself making batch after batch. Happy baking!
Frequently Asked Questions:
Why are my cookies flat and crispy instead of soft and chewy?
This often happens when there’s too much sugar or butter in the dough, or if the cookies are overbaked. For the best soft chocolate chip cookies, ensure you’re measuring your ingredients accurately, especially the flour (spoon it into your measuring cup and level it off, don’t scoop directly from the bag). Also, watch the baking time closely; pulling them out when the edges are just set and the centers still look slightly underdone is crucial for that soft texture.
Can I make these cookies ahead of time?
Absolutely! You can prepare the dough up to 2-3 days in advance and store it in the refrigerator. This chilling period actually enhances the flavor and texture. Alternatively, you can portion out the dough balls, freeze them on a baking sheet until solid, and then transfer them to a freezer-safe bag for up to 3 months. Bake from frozen, adding a minute or two to the baking time.
What kind of chocolate chips should I use?
While semi-sweet chocolate chips are a classic choice and work wonderfully, feel free to explore! Milk chocolate chips will yield a sweeter cookie, while dark chocolate chips offer a more intense cocoa flavor. You can even use a blend of different types of chips, or opt for chocolate chunks for larger pockets of melted chocolate.
The Best Soft Chocolate Chip Cookies
Classic soft and chewy chocolate chip cookies with a perfect balance of sweetness and chocolate.
Ingredients
-
8 tablespoons salted butter, softened
-
1/2 cup white sugar
-
1/4 cup packed light brown sugar
-
1 teaspoon vanilla extract
-
1 large egg
-
1 1/2 cups all purpose flour
-
1/2 teaspoon baking soda
-
1/4 teaspoon salt
-
3/4 cup chocolate chips
Instructions
-
Step 1
Cream together the softened butter, white sugar, and brown sugar until light and fluffy. -
Step 2
Beat in the vanilla extract and egg until well combined. -
Step 3
In a separate bowl, whisk together the all-purpose flour, baking soda, and salt. -
Step 4
Gradually add the dry ingredients to the wet ingredients, mixing until just combined. Do not overmix. -
Step 5
Stir in the chocolate chips until evenly distributed throughout the dough. -
Step 6
Drop rounded tablespoons of dough onto ungreased baking sheets, spaced about 2 inches apart. -
Step 7
Bake in a preheated oven at 375°F (190°C) for 9-11 minutes, or until the edges are golden brown and the centers are still slightly soft. -
Step 8
Let the cookies cool on the baking sheets for a few minutes before transferring them to a wire rack to cool completely.
Important Information
Nutrition Facts (Per Serving)
It is important to consider this information as approximate and not to use it as definitive health advice.
Allergy Information
Please check ingredients for potential allergens and consult a health professional if in doubt.