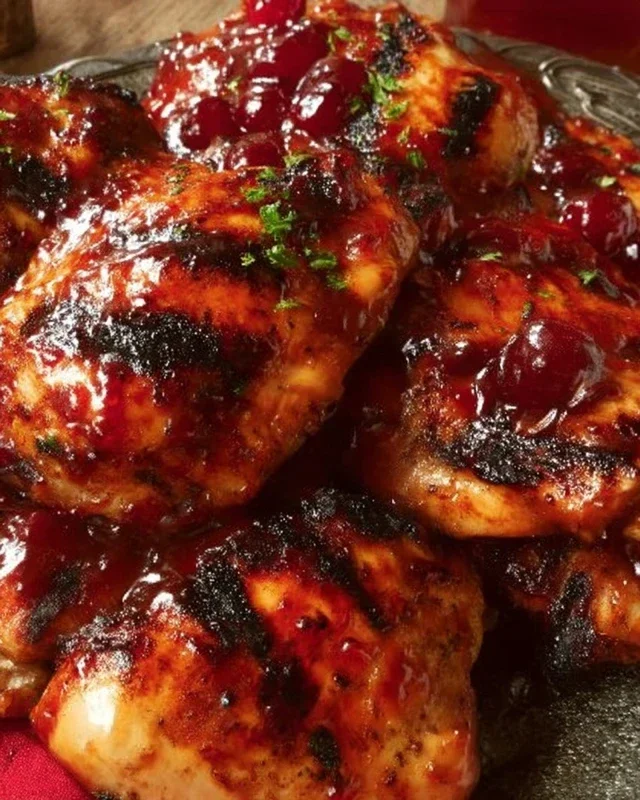
Cherry Dr Pepper Grilled Chicken Recipe
Cherry Dr. Pepper Grilled Chicken is the undisputed star of our summer barbecue lineup, and for good reason! This dish takes the humble grilled chicken breast and elevates it to a flavor explosion that’s both sweet, tangy, and utterly irresistible. Imagin extracte tender, juicy chicken infused with the distinct, delightful taste of cherry Dr. Pepper, all kissed by the smoky char of the grill. It’s a flavor combination that might sound a little unexpected, but trust me, it’s a revelation that has families and friends beggin extractg for the recipe. People adore it because it’s a guaranteed crowd-pleaser, offering a unique twist on a backyard classic. What truly sets this Cherry Dr. Pepper Grilled Chicken apart is the magical transformation of a simple soda into a deeply flavorful marinade and glaze, creating a sticky, sweet, and savory crust that’s simply addictive.
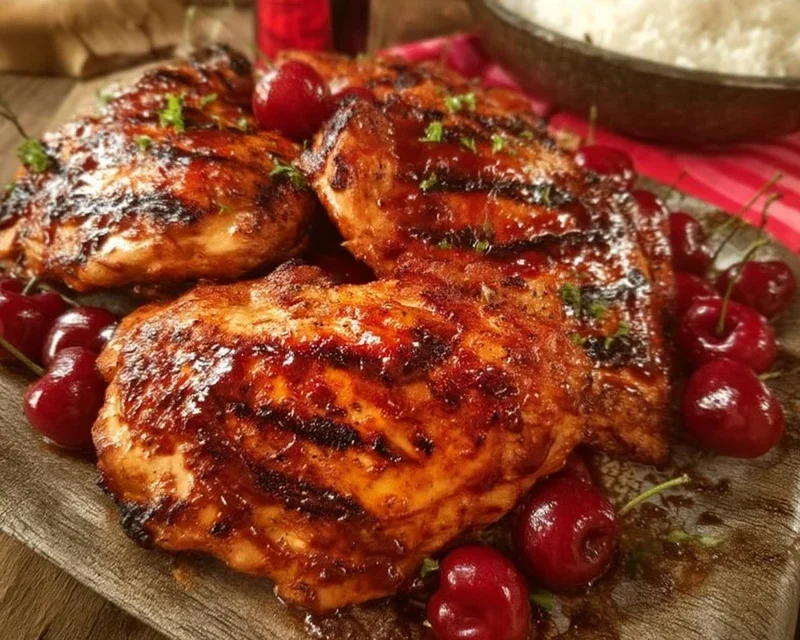
Cherry Dr. Pepper Grilled Chicken
This recipe for Cherry Dr. Pepper Grilled Chicken is an absolute game-changer for your summer cookouts. Imagin extracte juicy, tender chicken coated in a sticky, sweet, and tangy glaze with a hint of smokiness that’s simply irresistible. The secret? A surprisingly delightful combination of Cherry Dr. Pepper and classic BBQ ingredients creates a sauce that caramelizes beautifully on the grill, infusing every bite with incredible flavor. It’s easy enough for a weeknight dinner but special enough to impress your guests at your next barbecue. Get ready to become the grilling hero of the neighborhood!
Ingredients:
Cooking Instructions:
Preparing the Marinade and Chicken
The first step to grilling perfection is preparing your chicken and the incredible sauce. In a medium saucepan, combine the Cherry Dr. Pepper, ketchup, tomato paste, brown sugar, Worcestershire sauce, onion powder, black pepper, liquid smoke, chili powder, and minced garlic. Stir everything together until well combined. Place the saucepan over medium heat and bring the mixture to a gentle simmer. Allow it to simmer for about 15-20 minutes, stirring occasionally, until it thickens into a delicious, syrupy glaze. This simmering process is crucial for developing the deep flavors and achieving that perfect sticky consistency on the grill. As it simmers, the sugar will caramelize slightly, and the carbonation from the Dr. Pepper will dissnon-alcoholic ipate, leaving behind a rich, concentrated flavor. While the sauce is simmering, prepare your chicken. Pat the chicken pieces completely dry with paper towels. This is an important step as it helps the seasoning adhere better and promotes crispier skin on the grill. In a large bowl or on a platter, generously season the chicken pieces all over with the seasoning salt and paprika. Make sure to get into all the nooks and crannies for an even flavor distribution.
Grilling the Chicken
Now comes the fun part – grilling! Preheat your grill to medium-high heat, about 375-400 degrees Fahrenheit. It’s important to have a grill that’s hot enough to sear the chicken and develop those beautiful grill marks, but not so hot that it burns the sauce before the chicken is cooked through. Clean your grill grates thoroughly and oil them to prevent sticking. Place the seasoned chicken pieces directly onto the hot grill grates. Grill for about 5-7 minutes per side, allowing the chicken to get a nice sear and develop some color. Don’t overcrowd the grill; cook in batches if necessary to ensure even cooking and easy flipping.
Glazing and Finishing
Once the chicken has had a chance to sear on both sides, it’s time to introduce the star of the show: the Cherry Dr. Pepper glaze. Using a brush, generously coat each piece of chicken with the thickened glaze. Be sure to get a good, even layer. Close the grill lid and continue to cook for another 10-15 minutes, flipping the chicken and reapplying the glaze every 5 minutes or so. The repeated glazing is what creates that wonderfully sticky, caramelized exterior. Keep an eye on the chicken to ensure the glaze doesn’t burn. If you notice it starting to char too quickly, reduce the heat on your grill slightly. The total grilling time will vary depending on the size and cut of your chicken pieces, but a good rule of thumb is to cook until the internal temperature of the thickest part of the chicken reaches 165 degrees Fahrenheit. You can check this with a meat thermometer.
Resting and Serving
Once your Cherry Dr. Pepper grilled chicken has reached the perfect internal temperature and is beautifully glazed, remove it from the grill. Transfer the chicken to a clean platter or cutting board. It’s crucial to let the chicken rest for at least 5-10 minutes before serving. This resting period allows the juices to redistribute throughout the meat, resulting in incredibly moist and tender chicken. If you cut into it too soon, all those delicious juices will run out onto the plate. While the chicken is resting, you can even brush on a final layer of glaze if you like a really intense sweetness. This dish is fantastic served with classic barbecue sides like potato salad, coleslaw, cornbread, or a fresh green salad. The sweet and tangy flavors of the chicken will complement a wide range of accompaniments beautifully. Enjoy the incredible taste of your homemade Cherry Dr. Pepper grilled chicken – it’s sure to be a new favorite!
Conclusion:
So there you have it – a fantastic recipe for Cherry Dr. Pepper Grilled Chicken that’s sure to become a summer staple! This dish is incredibly simple to make, yet delivers a burst of sweet, tangy, and savory flavor that’s utterly irresistible. The caramelization from the grill combined with the unique sweetness of the Cherry Dr. Pepper creates a flavor profile that is both familiar and exciting. It’s the perfect centerpiece for any backyard barbecue, family gathering, or even a weeknight dinner when you want something special with minimal fuss.
I love serving this grilled chicken with classic barbecue sides like corn on the cob, potato salad, or a fresh, crisp coleslaw. For a lighter option, a simple green salad or grilled asparagus makes a wonderful accompaniment. Don’t be afraid to get creative with your variations! You can easily add a pinch of cayenne pepper for a touch of heat, or incorporate a splash of soy sauce into the marinade for an extra layer of umami. Give this Cherry Dr. Pepper Grilled Chicken recipe a try – I’m confident you’ll be hooked!
Frequently Asked Questions:
Can I make this recipe indoors?
Absolutely! While grilling offers that wonderful smoky char, you can achieve delicious results indoors. You can pan-sear the chicken in a skillet over medium-high heat until cooked through, or bake it in the oven at 400°F (200°C) for about 20-25 minutes, flipping halfway. You’ll still get that fantastic Cherry Dr. Pepper glaze!
What kind of chicken works best for this recipe?
This recipe is quite versatile! Chicken thighs are particularly forgiving and stay incredibly moist, making them a top choice. However, chicken breasts also work wonderfully, just be mindful of cooking times to prevent them from drying out. You can even use chicken wings for a fun appetizer!
How long does the marinade need to sit?
For the best flavor infusion, I recommend marinating the chicken for at least 30 minutes at room temperature, or for up to 4 hours in the refrigerator. If you’re pressed for time, even 15 minutes will impart some of that delicious Cherry Dr. Pepper goodness.
Cherry Dr. Pepper Grilled Chicken
A sweet and smoky grilled chicken recipe featuring a unique glaze made with Cherry Dr. Pepper, ketchup, and brown sugar.
Ingredients
-
1 – 12 oz can Cherry Dr. Pepper
-
1 Cup Ketchup
-
1 – 6 oz. can tomato paste
-
1 Cup Brown Sugar
-
1 Tablespoon Worcestershire sauce
-
1/2 tsp. Onion Powder
-
1/2 tsp. black pepper
-
1/2 tsp. liquid smoke
-
1/2 tsp. Chili Powder
-
1 tsp. minced garlic
-
1 whole chicken cut up OR 1 package of dark meat chicken cut up about 12 pieces of chicken
-
3 teaspoons Seasoning Salt
-
1 tsp Paprika
Instructions
-
Step 1
In a medium saucepan, combine Cherry Dr. Pepper, ketchup, tomato paste, brown sugar, Worcestershire sauce, onion powder, black pepper, liquid smoke, chili powder, and minced garlic. Bring to a simmer over medium heat, stirring occasionally, until slightly thickened. This will take about 15-20 minutes. -
Step 2
While the sauce is simmering, season the chicken pieces generously with seasoning salt and paprika. If using a whole chicken, cut it into serving pieces. If using dark meat, ensure it’s about 12 pieces. -
Step 3
Preheat your grill to medium-high heat. Clean and lightly oil the grill grates. -
Step 4
Place the seasoned chicken on the preheated grill. Grill for about 20-25 minutes, turning occasionally, until the chicken is almost cooked through. -
Step 5
Begin basting the chicken with the prepared Cherry Dr. Pepper glaze during the last 15-20 minutes of grilling. Continue to grill and baste until the chicken is fully cooked and the glaze is caramelized and sticky. The internal temperature should reach 165°F (74°C). -
Step 6
Remove chicken from the grill and let it rest for 5-10 minutes before serving. Serve with extra glaze on the side if desired.
Important Information
Nutrition Facts (Per Serving)
It is important to consider this information as approximate and not to use it as definitive health advice.
Allergy Information
Please check ingredients for potential allergens and consult a health professional if in doubt.