Chocolate Zucchini Brownies-Delicious & Healthy Treat
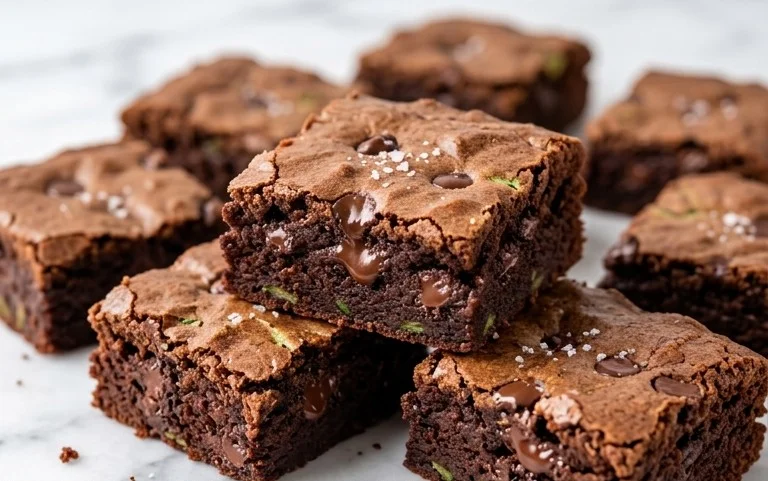
Chocolate Zucchini Brownies are about to become your new favorite way to sneak some veggies into your life – and believe me, no one will ever know! We all love a good brownie, right? That rich, fudgy texture, that intense chocolatey goodness that just melts in your mouth. But what if I told you that you could achieve all that, and then some, with the addition of a secret ingredient? That’s where these amazing Chocolate Zucchini Brownies come in. They’re incredibly moist, decadently rich, and surprisingly healthy-ish. The zucchini, a truly remarkable ingredient in this context, completely disappears, leaving behind only a tender crum extractb and an even more satisfying chew. Get ready to be amazed by how a simple vegetable can elevate your brownie game to an entirely new level. This recipe is a game-changer for any chocolate lover seeking a guilt-free indulgence.
Chocolate Zucchini Brownies Recipe
Welcome to a truly delightful discovery! If you’re like me, you love the rich, fudgy goodness of a classic brownie. But what if I told you we could sneak in some wholesome goodness without compromising on that decadent chocolate flavor? Enter these Chocolate Zucchini Brownies. Trust me, you won’t even taste the zucchini, but you will absolutely taste the intensely chocolatey, moist, and utterly irresistible brownie. This recipe is a game-changer for anyone looking to add a little extra nutrition to their sweet treats, or for those who just happen to have a surplus of zucchini from their garden (we’ve all been there!). These brownies are perfect for a snack, a dessert, or even a “breakfast of cbeef hampions” if you’re feeling bold. Let’s get baking!
Ingredients:
Let’s Get Baking!
The beauty of these brownies lies in their simplicity and the way they come together. We’ll start by creating the brownie batter, then whip up a quick, luscious chocolate glaze to elevate them to pure perfection.
Step 1: Preparing the Zucchini and Dry Ingredients
First things first, let’s get our zucchini ready. You’ll need 2 1/2 cups of finely shredded zucchini. The easiest way to do this is with a box grater. Grate it on the fine side. Now, and this is an important tip for fudgy, not soggy, brownies: gently squeeze out as much excess moisture as you can from the shredded zucchini. You can do this by placing it in a clean kitchen towel or a few layers of paper towels and wringin extractg it out. Don’t be shy, a good squeeze will make a difference! Set your prepared zucchini aside.
In a large bowl, whisk together the dry ingredients for the brownies: 2 cups of all-purpose flour, 1/2 cup of dark chocolate unsweetened cocoa powder, 1 1/2 teaspoons of baking soda, and 1 teaspoon of kosher salt. Give this a good whisk to ensure everything is evenly distributed. This ensures your leavening agents and salt are spread throughout the batter, leading to a consistent rise and flavor in your finished brownies.
Step 2: Creating the Wet Ingredients and Combining
In a separate medium bowl, whisk together the wet ingredients for the brownie base: 1/2 cup of vegetable oil, 1 cup of granulated sugar, 1/2 cup of light brown sugar (make sure it’s packed firmly), and 2 teaspoons of vanilla extract. Whisk this until it’s well combined and the sugars have started to dissolve into the oil. This mixture forms the foundation of our brownie’s tender crum extractb and sweet flavor.
Now, it’s time to bring it all together! Pour the wet ingredients into the bowl with the dry ingredients. Begin extract to mix them together with a spatula or wooden spoon. Don’t overmix at this stage. We’re just looking to combine the ingredients until no dry streaks of flour remain. Overmixing can develop the gluten in the flour too much, resulting in tougher brownies, and we want them to be wonderfully soft and fudgy.
Step 3: Incorporating the Zucchini and Baking
Gently fold the 2 1/2 cups of finely shredded and squeezed zucchini into the brownie batter. Again, be careful not to overmix. The goal is to distribute the zucchini evenly throughout the batter without overworking it. The batter will be quite thick at this point.
Prepare a 9×13 inch baking pan by greasing it lightly and lining it with parchment paper, leaving some overhang on the sides. This makes it super easy to lift the brownies out of the pan once they’re baked. Spread the brownie batter evenly into the prepared pan.
Preheat your oven to 350°F (175°C). Bake the brownies for 25-30 minutes, or until a toothpick inserted into the center comes out with moist crum extractbs attached, but no wet batter. The edges should look set. Keep an eye on them, as oven temperatures can vary.
Step 4: Making the Luscious Chocolate Glaze
While the brownies are baking and then cooling, let’s whip up a decadent chocolate glaze that will take them over the top. In a medium bowl, combine the 1/4 cup of melted unsalted butter, 5 tablespoons of dark chocolate unsweetened cocoa powder, and 1/2 teaspoon of vanilla extract. Stir these together until they form a thick paste.
Gradually whisk in the 2 cups of powdered sugar, alternating with the 6 tablespoons of heavy whipping cream. Start with about half the powdered sugar and half the cream, whisking until smooth. Then add the remaining powdered sugar and cream, whisking until you achieve a smooth, pourable glaze. You want the glaze to be thick enough to coat the brownies nicely but not so thick that it’s difficult to spread. If it’s too thick, add a tiny bit more cream (a teaspoon at a time). If it’s too thin, add a little more powdered sugar. The result should be a glossy, rich chocolate glaze.
Step 5: Glazing and Enjoying Your Masterpiece
Once the brownies have finished baking, remove them from the oven and let them cool completely in the pan on a wire rack. This is crucial! Trying to glaze warm brownies will result in a melted mess. Patience is a virtue, especially when delicious brownies are involved. Once they are completely cool, lift the brownies out of the pan using the parchment paper overhang.
Pour the prepared chocolate glaze evenly over the cooled brownies, spreading it to the edges with your spatula. You can gently tilt the pan to help distribute the glaze, or use your spatula to encourage it to cover the entire surface. For an extra touch, you can sprinkle some chocolate chips, chopped nuts, or even flaky sea salt over the glaze before it sets. Let the glaze set for at least 15-20 minutes before cutting into your perfect Chocolate Zucchini Brownies. Slice them into squares and prepare for pure chocolate bliss! These are best stored in an airtight container at room temperature for up to 3 days, though they rarely last that long! Enjoy every fudgy, moist, and secretly veggie-packed bite!
Conclusion:
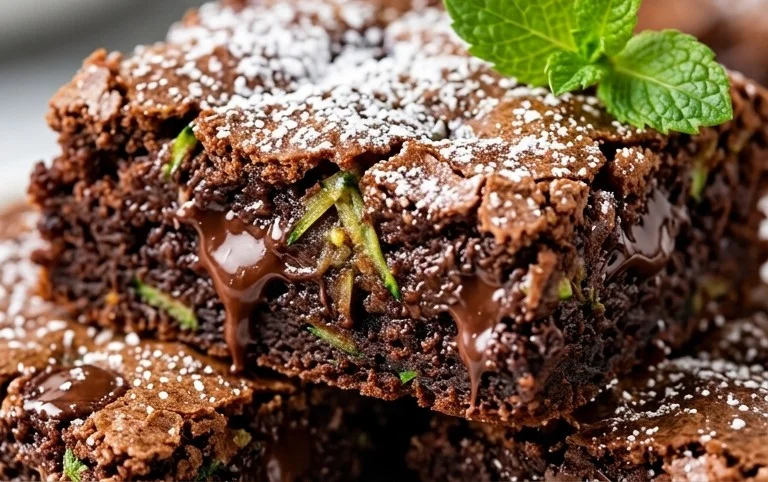
And there you have it – a foolproof recipe for delicious Chocolate Zucchini Brownies that are sure to become a new favorite! The magic of this recipe lies in its ability to deliver all the rich, fudgy goodness of a classic brownie while sneakily incorporating the goodness of zucchini. This humble vegetable adds moisture and a tender crum extractb without imparting any discernible zucchini flavor, making them perfect for picky eaters and brownie enthusiasts alike. You’ll be amazed at how these Chocolate Zucchini Brownies transform simple ingredients into an irresistible treat.
These brownies are incredibly versatile. Enjoy them warm straight from the oven with a scoop of vanilla ice cream for the ultimate indulgence, or let them cool completely for a perfect grab-and-go snack. They’re also fantastic dusted with a little powdered sugar or drizzled with extra chocolate ganache. For variations, consider adding a handful of chocolate chips (dark, milk, or white!), chopped nuts like walnuts or pecans, or even a sprinkle of espresso powder to deepen the chocolate flavor. Don’t be afraid to experiment!
I truly hope you’ll give these Chocolate Zucchini Brownies a try. They’re a testament to how delicious healthy-ish baking can be, and I’m confident you’ll love the results as much as I do. Happy baking!
Frequently Asked Questions:
Do I need to peel the zucchini?
No, you do not need to peel the zucchini. The skin contains nutrients and blends in seamlessly with the batter, so you can simply wash it and grate it.
Can I taste the zucchini in these brownies?
Absolutely not! The flavor of the zucchini is completely masked by the rich chocolate. The zucchini primarily contributes to moisture and a wonderfully tender texture.
How long do these brownies last?
Stored in an airtight container at room temperature, these Chocolate Zucchini Brownies will stay fresh for about 3-4 days. For longer storage, they can be refrigerated for up to a week or frozen for a couple of months.
Chocolate Zucchini Brownies
Moist and fudgy chocolate zucchini brownies topped with a rich chocolate glaze. A delicious way to sneak in some vegetables!
Ingredients
-
1/2 cup vegetable oil
-
1 cup granulated sugar
-
1/2 cup light brown sugar (packed)
-
2 teaspoons vanilla extract
-
2 cups all-purpose flour
-
1/2 cup dark chocolate unsweetened cocoa powder
-
1 1/2 teaspoon baking soda
-
1 teaspoon kosher salt
-
2 1/2 cups finely shredded zucchini
-
1/4 cup unsalted butter (melted)
-
5 Tablespoons dark chocolate unsweetened cocoa powder
-
2 cups powdered sugar
-
6 Tablespoons heavy whipping cream
-
1/2 teaspoon vanilla extract
Instructions
-
Step 1
Preheat oven to 350°F (175°C). Grease and flour a 9×13 inch baking pan. -
Step 2
In a large bowl, whisk together vegetable oil, granulated sugar, light brown sugar, and 2 teaspoons vanilla extract. -
Step 3
In a separate bowl, whisk together all-purpose flour, 1/2 cup cocoa powder, baking soda, and salt. -
Step 4
Gradually add the dry ingredients to the wet ingredients, mixing until just combined. Stir in the finely shredded zucchini. -
Step 5
Pour batter into the prepared baking pan and spread evenly. Bake for 30-35 minutes, or until a toothpick inserted into the center comes out with moist crumbs. -
Step 6
While brownies are baking, prepare the glaze. In a medium bowl, whisk together melted butter, 5 Tablespoons cocoa powder, powdered sugar, heavy whipping cream, and 1/2 teaspoon vanilla extract until smooth. -
Step 7
Let the brownies cool completely in the pan before spreading the glaze over the top. -
Step 8
Cut into squares and serve.
Important Information
Nutrition Facts (Per Serving)
It is important to consider this information as approximate and not to use it as definitive health advice.
Allergy Information
Please check ingredients for potential allergens and consult a health professional if in doubt.