Crispy Chicken Caesar Sandwich Recipe- Easy & Delicious
Crispy Chicken Caesar Sandwich. Oh, how I adore this classic reimagin extracted! There’s something undeniably magical about taking all the beloved flavors of a traditional Caesar salad – the tangy dressing, the salty Parmesan, the crisp romaine – and stuffing them between two perfectly toasted slices of bread with a star ingredient: gloriously crispy chicken. It’s more than just a sandwich; it’s a symphony of textures and tastes that hits all the right notes. Why does it capture our hearts (and stomachs)? Because it’s familiar yet exciting. It’s comfort food elevated, a weeknight savior, and a lunchbox hero all rolled into one. What truly makes this Crispy Chicken Caesar Sandwich special is the satisfying crunch of the chicken, a delightful contrast to the creamy dressing and fresh greens. It’s the kind of meal that makes you close your eyes in pure enjoyment.
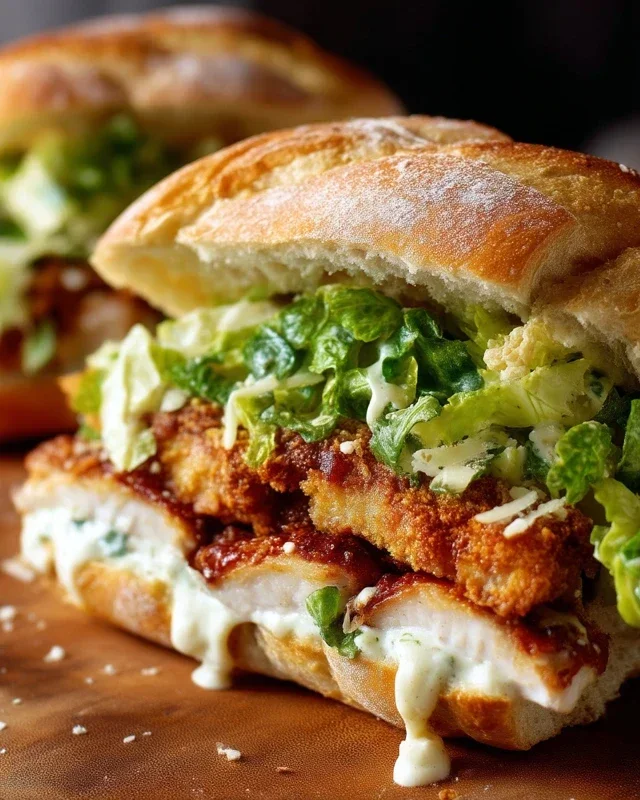
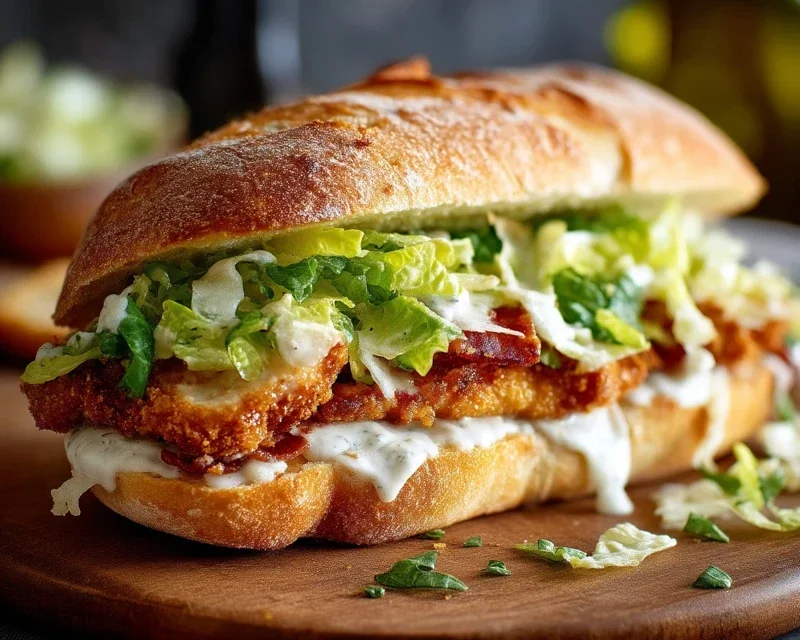
Crispy Chicken Caesar Sandwich
There’s something undeniably satisfying about a well-made sandwich, and when it comes to indulgence, few can rival the classic Caesar salad. Now, imagin extracte that tangy, creamy, garlicky goodness wrapped around perfectly crispy fried chicken, all nestled between soft bread. That’s the magic of my Crispy Chicken Caesar Sandwich. This isn’t just lunch; it’s an experience. We’re talking about a flavor explosion where the savory crunch of the chicken meets the bright zest of the Caesar dressing, elevated by the umami of Parmesan. It’s surprisingly simple to make at home, and the results are restaurant-worthy. Let’s dive in and create this masterpiece.
Ingredients:
Making the Caesar Dressing
The heart of this sandwich is, of course, the Caesar dressing. While store-bought is convenient, a homemade dressing elevates everything. It’s incredibly easy and the fresh ingredients make a noticeable difference.
Preparing the Crispy Chicken
This is where the magic happens – turning simple chicken cutlets into golden, crispy perfection. The key is a good breading and the right frying temperature.
Assembling Your Masterpiece
With our crispy chicken and luscious Caesar dressing ready, it’s time to bring it all together for the ultimate sandwich experience.
Note 1: For the chicken cutlets, you can use thinly sliced chicken breast or thigh meat. If your chicken breasts are thick, you can pound them out to an even thickness between two pieces of plastic wrap or parchment paper. This ensures they cook quickly and evenly. Enjoy your incredible Crispy Chicken Caesar Sandwich!
Conclusion:
There you have it – your guide to crafting the ultimate Crispy Chicken Caesar Sandwich! This recipe isn’t just about a sandwich; it’s about achieving that perfect balance of textures and flavors that makes a meal truly memorable. The satisfying crunch of the fried chicken, the cool creaminess of the Caesar dressing, the sharp bite of Parmesan, and the fresh crispness of romaine all come together in a harmonious bite that’s both comforting and incredibly satisfying. It’s the kind of sandwich that elevates a quick lunch or becomes the star of a casual dinner.
I truly encourage you to give this Crispy Chicken Caesar Sandwich a try. It’s surprisingly straightforward to make, and the results are undeniably delicious. Feel free to customize it to your heart’s content – swap out the bread, add some pickled onions for a tangy kick, or even toss in some crispy beef bacon for extra indulgence. Serve it alongside a light salad, some seasoned fries, or even just enjoy it on its own. It’s versatile enough for any occasion.
Frequently Asked Questions:
Can I make the chicken ahead of time?
Yes, absolutely! You can fry the chicken breasts a day in advance and store them in an airtight container in the refrigerator. Reheat them gently in a preheated oven or a skillet until warmed through to maintain their crispiness.
What if I don’t have a food processor for the Caesar dressing?
No problem at all! You can easily make a delicious Caesar dressing by hand. Simply whisk together the ingredients vigorously in a bowl until well combined and emulsified. It might take a little more elbow grease, but the result will be just as tasty.
Are there any gluten-free options for this sandwich?
Certainly! For a gluten-free Crispy Chicken Caesar Sandwich, you can opt for gluten-free bread or even serve the crispy chicken and toppings in a large lettuce wrap. Ensure your breading for the chicken also uses gluten-free flour and breadcrum extractbs.
Crispy Chicken Caesar Sandwich
A delicious and crispy chicken sandwich with a homemade Caesar dressing.
Ingredients
-
½ cup full-fat mayonnaise
-
3 tbsp Greek yogurt
-
1 tsp Dijon mustard
-
1 tsp Worcestershire sauce
-
2 tbsp lemon juice
-
¼ cup Parmesan cheese (freshly grated)
-
1-2 garlic cloves (minced)
-
¼ tsp black pepper
-
Pinch sea salt
-
5 chicken cutlets
-
sea salt (to taste)
-
ground black pepper (to taste)
-
Oil (for frying)
-
⅓ cup all-purpose flour
-
½ tsp salt
Instructions
-
Step 1
In a medium bowl, whisk together mayonnaise, Greek yogurt, Dijon mustard, Worcestershire sauce, lemon juice, Parmesan cheese, minced garlic, ¼ tsp black pepper, and a pinch of sea salt for the Caesar dressing. Cover and refrigerate. -
Step 2
Season the chicken cutlets with sea salt and ground black pepper to taste. -
Step 3
In a shallow dish, combine the all-purpose flour with ½ tsp salt. Dredge each chicken cutlet in the flour mixture, ensuring it’s evenly coated. -
Step 4
Heat enough oil in a large skillet over medium-high heat for shallow frying. Carefully place the floured chicken cutlets into the hot oil. -
Step 5
Fry the chicken cutlets for 4-6 minutes per side, or until golden brown and cooked through. Remove from the skillet and place on a paper towel-lined plate to drain excess oil. -
Step 6
Assemble the sandwiches by spreading a generous amount of the prepared Caesar dressing on the sandwich buns. Top with a crispy chicken cutlet and any desired additional toppings. Serve immediately.
Important Information
Nutrition Facts (Per Serving)
It is important to consider this information as approximate and not to use it as definitive health advice.
Allergy Information
Please check ingredients for potential allergens and consult a health professional if in doubt.