Easy Homemade Fruit Leather Recipe- Delicious & Healthy Snack
Homemade Fruit Leather Recipe: Get ready to unlock a world of vibrant, chewy, and utterly delicious sweetness right in your own kitchen! I’ve always adored fruit leather, haven’t you? It’s that perfect snack that transports me back to childhood summers, a burst of pure fruit flavor in a convenient, portable package. What makes this homemade fruit leather recipe so special is its incredible versatility and the fact that you control exactly what goes into it. Forget those store-bought versions loaded with artificial colors and preservatives. With this simple approach, you can craft a healthier, tastier, and truly satisfying treat using your favorite fruits, whether it’s a classic strawberry, a tangy raspberry, or a tropical mango blend. The satisfaction of peeling back a perfectly set sheet of homemade fruit leather is truly unparalleled.
Homemade Fruit Leather Recipe
There’s something incredibly satisfying about making your own fruit leather. It’s a wonderfully simple process that transforms fresh fruit into a chewy, flavorful treat reminiscent of childhood summers. Forget the store-bought varieties with their long ingredient lists and artificial flavors; this homemade version is all about pure, vibrant fruit goodness. Plus, it’s a fantastic way to use up an abundance of seasonal fruits. The beauty of fruit leather lies in its versatility. You can use almost any fruit you love, or a combination of your favorites. This recipe provides a basic framework, but feel free to experiment with different fruits and flavor profiles.
Ingredients:
Fruit Options:
The “fruit” component is where you can really let your creativity shine! My go-to is usually a mix of berries like strawberries and raspberries for their sweetness and vibrant color. Peaches and nectarines also lend themselves beautifully to fruit leather, offering a smoother texture and a more delicate flavor. Apples and pears are excellent choices too, especially when combined with a pinch of cinnamon for added warmth. If you’re feeling adventurous, consider tropical fruits like mango or pineapple for a taste of paradise. The key is to use ripe, flavorful fruit for the best results. Chop your chosen fruit into roughly ½-inch pieces. If you’re using larger fruits like apples or pears, you might want to peel them first, although it’s not strictly necessary as the skins will be blended away.
Preparing the Fruit Base
The first step to creating our delicious fruit leather is to get our fruit ready for blending. Take your 2 cups of chopped fruit and place it into a medium saucepan. If you are using particularly tart fruits, you might find that you need to adjust the sugar content slightly later on. For now, we’ll stick to the recipe’s recommended amount.
Cooking and Sweetening
Add the 3 tablespoons of white sugar to the saucepan with the fruit. The sugar not only adds sweetness but also helps to draw out the fruit’s natural juices and contributes to a better texture in the final product. Next, squeeze in the juice of ½ a whole lemon. The lemon juice is crucial. It acts as a natural preservative, preventing spoilage and also brightens the fruit’s flavors, giving the fruit leather a more complex and refreshing taste. If your fruit is already very sweet, you might consider using a little less sugar, or even a sugar substitute, but for a classic, satisfying sweetness, white sugar is hard to beat. Stir everything together gently.
Simmering to Soften
Place the saucepan over medium heat and bring the mixture to a gentle simmer. You’ll notice the fruit starting to soften and release its juices. Stir occasionally to prevent sticking. Continue to simmer for about 10-15 minutes, or until the fruit is very soft and easily pierced with a fork. This cooking process breaks down the fruit’s structure, making it easier to blend into a smooth puree. It also helps to evaporate some of the excess moisture, which is important for achieving that perfect chewy consistency in your fruit leather.
Blending to Perfection
Once the fruit is nice and soft, carefully remove the saucepan from the heat. Now comes the fun part: transforming the cooked fruit into a smooth puree. You have a couple of options here. For the smoothest texture, I highly recommend using an immersion blender directly in the saucepan. This minimizes cleanup. Blend the fruit mixture until it is completely smooth, with no lumps or chunks remaining. If you don’t have an immersion blender, you can carefully transfer the hot mixture to a regular blender or a food processor. Be very cautious when blending hot liquids, and never fill a blender more than halfway. Blend until you achieve a silky-smooth consistency. If you notice any seeds from berries, you can strain the puree through a fine-mesh sieve at this stage for an even smoother result, though I often find them to be a charming little texture addition.
Spreading and Dehydrating
Preheat your oven to its lowest possible temperature, ideally around 170°F (75°C). If your oven doesn’t go that low, don’t worry too much; just aim for the absolute lowest setting. Line a baking sheet with parchment paper or a silicone baking mat. This is crucial for easy removal of the fruit leather later on. Pour the fruit puree onto the prepared baking sheet. Using a spatula, spread the puree as thinly and evenly as possible. Aim for a thickness of about ¼ inch. The thinner you spread it, the faster it will dry. Try to get the edges as smooth as the center to ensure even drying. Any thick spots will take longer to dehydrate and might result in an uneven texture.
Place the baking sheet in the preheated oven. This is where patience comes in! The drying process can take anywhere from 4 to 12 hours, depending on the thickness of your fruit leather, the humidity in your home, and the specific temperature of your oven. Check on it periodically. You’re looking for the fruit leather to be firm to the touch and no longer sticky. It should peel away cleanly from the parchment paper. If it’s still tacky, let it dry for longer. To speed up the process slightly, you can prop the oven door open a crack with a wooden spoon, allowing moisture to escape more freely. However, be mindful of dust and pests if you do this.
Cooling and Storing
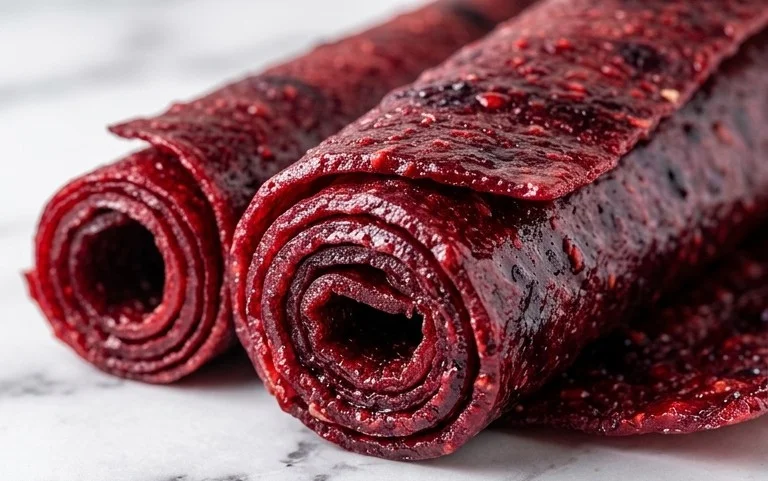
Once the fruit leather is completely dry and no longer sticky, carefully remove it from the oven. Let it cool completely on the baking sheet. As it cools, it will become even more pliable. Once it’s at room temperature, you can gently peel it off the parchment paper. Now comes the fun part of slicing and storing! You can cut the large sheet into strips, squares, or even roll them up into little logs. For storage, I like to wrap individual pieces tightly in plastic wrap or wax paper to prevent them from sticking together. Store your homemade fruit leather in an airtight container at room temperature for up to two weeks, or in the refrigerator for longer storage. The vibrant color and delicious flavor will make it a hit with everyone!
Conclusion:
And there you have it – your very own homemade fruit leather recipe! Making fruit leather is such a rewarding experience, transforming simple, fresh fruit into a delightfully chewy and naturally sweet treat. It’s a fantastic way to preserve seasonal produce, reduce food waste, and avoid the artificial ingredients often found in store-bought versions. The process is surprisingly simple, making it perfect for bakers of all skill levels, and the result is a snack that’s both delicious and healthy. I encourage you to give this recipe a try; you’ll be amazed at how easy it is to create these vibrant, flavorful leathers!
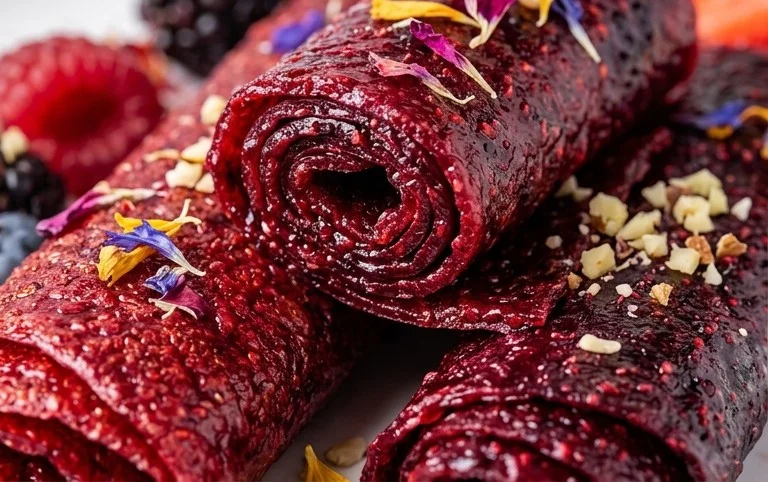
These fruit leathers are incredibly versatile. Enjoy them as a healthy snack on their own, pack them into lunchboxes for a fun surprise, or even crum extractble them over yogurt or ice cream for a burst of fruity flavor. For variations, feel free to experiment with different fruit combinations – try a tropical blend of mango and pineapple, a tart mix of berries and apple, or even add a hint of spice like cinnamon or gin extractger. The possibilities are endless, allowing you to tailor your fruit leather to your exact taste preferences.
Frequently Asked Questions:
Can I make fruit leather without a dehydrator?
Absolutely! You can make delicious fruit leather in your oven. Simply spread the fruit puree onto a baking sheet lined with parchment paper and bake at the lowest temperature your oven allows (usually around 170°F or 75°C) for several hours, until the leather is no longer sticky to the touch. This method works wonderfully for this homemade fruit leather recipe.
How should I store homemade fruit leather?
Once completely cooled, you can store your fruit leather at room temperature for up to a week, wrapped tightly in parchment paper or plastic wrap. For longer storage, wrap individual pieces and place them in an airtight container in the refrigerator for up to a month, or freeze them for even longer preservation. Enjoy your homemade goodness!
Homemade Fruit Leather
A simple and delicious recipe for making fruit leather at home using fresh fruit and a touch of sweetness.
Ingredients
-
2 cups fruit, chopped
-
3 tbsp white sugar
-
½ whole lemon, just the juice
-
1 tsp vanilla extract
-
Pinch of salt
-
1/4 cup water
Instructions
-
Step 1
Combine chopped fruit, white sugar, lemon juice, vanilla extract, and salt in a saucepan. -
Step 2
Cook over medium heat, stirring occasionally, until the fruit breaks down and the mixture thickens, about 10-15 minutes. -
Step 3
If using whole fruit pieces, you can puree the mixture using an immersion blender or transfer to a regular blender until smooth. -
Step 4
Pour the fruit mixture onto a baking sheet lined with parchment paper or a silicone baking mat, spreading it thinly and evenly. -
Step 5
Bake in a preheated oven at 170°F (77°C) for 4-6 hours, or until the fruit leather is no longer sticky to the touch. -
Step 6
Let it cool completely before cutting into strips or shapes.
Important Information
Nutrition Facts (Per Serving)
It is important to consider this information as approximate and not to use it as definitive health advice.
Allergy Information
Please check ingredients for potential allergens and consult a health professional if in doubt.