Strawberry Swirl Cheesecake Cookie Cups-Easy Recipe
Strawberry Swirl Cheesecake Cookie Cups are about to become your new favorite dessert obsession. Imagin extracte the dreamy, creamy, tangy goodness of cheesecake meeting the comforting chegrape juicess of a perfect sugar cookie, all in a delightful, bite-sized package. We’re talking about a marriage of textures and flavors that’s simply divine! People adore these treats because they offer all the decadent pleasure of a full cheesecake without the fuss, and the vibrant swirl of fresh strawberry adds a beautiful visual appeal and a burst of refreshing sweetness that cuts through the richness. What makes these Strawberry Swirl Cheesecake Cookie Cups truly special is their perfect balance – the tender cookie base provides structure, while the luscious cheesecake filling, artfully swirled with ruby-red strawberry goodness, melts in your mouth. They’re surprisingly easy to make and are guaranteed to impress at any gathering, or simply make your afternoon a whole lot sweeter.
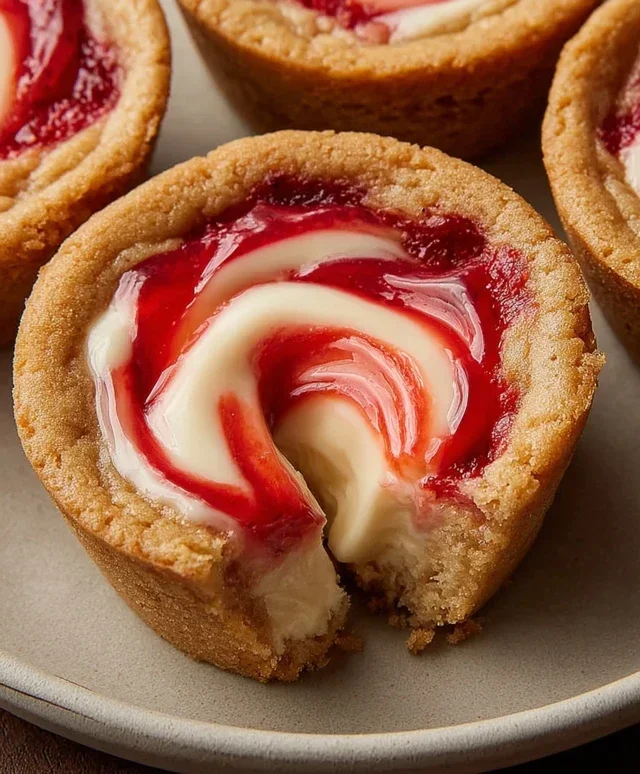
Strawberry Swirl Cheesecake Cookie Cups
Get ready to experience a delightful fusion of two beloved desserts: the classic cheesecake and the irresistible cookie! These Strawberry Swirl Cheesecake Cookie Cups are the perfect bite-sized treat that combines the buttery sweetness of a sugar cookie with the creamy tang of cheesecake, all swirled with vibrant strawberry goodness. They’re surprisingly easy to make and are guaranteed to be a hit at any gathering, or simply as a special treat for yourself. Imagin extracte a crisp, golden cookie base cradling a smooth, luscious cheesecake filling, with ribbons of sweet strawberry jam weaving through it. The contrast of textures and flavors is simply divine.
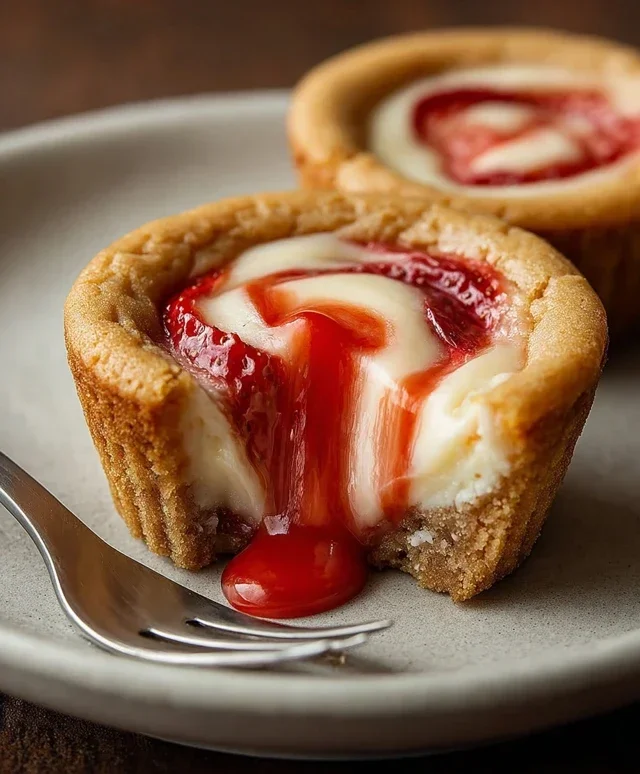
These little cups are incredibly versatile. You can enjoy them plain, or add a fresh strawberry slice or a sprinkle of chocolate shavings for an extra touch of elegance and flavor. They’re perfect for potlucks, parties, or even just an afternoon pick-me-up. The portable nature of these cookie cups makes them ideal for sharing, but be warned – they tend to disappear quickly! The magic lies in their simplicity and the way the flavors meld together so beautifully. The slight warmth of the strawberry jam as it bakes into the cheesecake filling creates a wonderful depth of flavor that’s utterly addictive.
Ingredients:
Making the Cookie Cups
The first step in creating these delightful treats is preparing the cookie cups that will form the base. We’ll be using refrigerated sugar cookie dough for ultimate convenience, but if you’re feeling ambitious, a homemade sugar cookie dough would also work beautifully. The key here is to get that perfect cookie cup shape.
1. Prepare Your Muffin Tin and Cookie Dough: Preheat your oven to 350 degrees Fahrenheit (175 degrees Celsius). Lightly grease a standard 12-cup muffin tin, or line it with paper liners. Open your roll of refrigerated sugar cookie dough. If the dough is very firm, let it sit at room temperature for a few minutes to soften slightly, making it easier to work with. Break off pieces of the cookie dough and press them evenly into the bottom and up the sides of each muffin cup. You want to create a nice, sturdy cup shape that will hold the cheesecake filling. Don’t worry if it’s not perfectly smooth; a rustic look is charming! Aim for a thickness of about ¼ inch for the cookie walls.
Crafting the Cheesecake Filling
Now, let’s move on to the luscious cheesecake filling that will bring a creamy decadence to our cookie cups. This part is wonderfully simple and requires just a few ingredients.
2. Whip Up the Cream Cheese Mixture: In a medium bowl, combine the softened cream cheese and granulated sugar. Using an electric mixer, beat these ingredients together until they are smooth and well combined, with no lumps of cream cheese remaining. This is crucial for a silky-smooth filling. Scrape down the sides of the bowl as needed to ensure everything is incorporated. Next, stir in the vanilla extract. The vanilla adds a wonderful aroma and depth of flavor that complements both the cookie and the strawberry. Beat until just combined; overmixing can sometimes lead to a less desirable texture.
Assembling the Strawberry Swirls
This is where the magic happens! We’ll be adding the strawberry jam and creating those beautiful, tempting swirls that give these cookie cups their name.
3. Layer and Swirl the Filling: Spoon the cream cheese mixture evenly into each of the cookie cups you prepared. Don’t fill them all the way to the top, as the filling will puff up slightly. Now, take your warmed strawberry jam. You want it warm enough to be pourable but not hot. Spoon about a teaspoon of the warmed strawberry jam onto the center of the cream cheese filling in each cookie cup. You can use a toothpick or the tip of a knife to gently swirl the jam into the cream cheese, creating a marbled effect. Don’t over-swirl; you want distinct ribbons of strawberry to be visible. A few gentle passes are all you need. This is where you can get creative with your swirling technique!
Baking and Cooling
The final stages involve baking these beauties to perfection and allowing them to cool so you can fully enjoy their delightful flavors and textures.
4. Bake Until Golden and Set: Place the prepared muffin tin into your preheated oven. Bake for approximately 18-22 minutes, or until the edges of the cookie cups are golden brown and the cheesecake filling is set. You’ll notice that the center of the filling should no longer be jiggly when you gently nudge the pan. Keep an eye on them to prevent over-baking, which can make the cookie edges too hard. The aroma filling your kitchen will be absolutely heavenly!
5. Cool and Garnish: Once baked, carefully remove the muffin tin from the oven. Let the cookie cups cool in the muffin tin for about 10-15 minutes. This allows them to firm up before you attempt to remove them. After this initial cooling period, gently run a thin knife or offset spatula around the edges of each cookie cup to loosen them, and then carefully transfer them to a wire rack to cool completely. Once they are fully cooled, you can add your optional garnishes. A fresh strawberry slice on top adds a beautiful visual and a burst of freshness, while chocolate shavings provide a decadent touch. Serve and enjoy these delightful Strawberry Swirl Cheesecake Cookie Cups!
Conclusion:
There you have it – the ultimate guide to creating these delightful Strawberry Swirl Cheesecake Cookie Cups! I genuinely believe this recipe is a winner because it perfectly marries the comforting chegrape juicess of a classic cookie with the tangy, creamy indulgence of cheesecake, all elevated by vibrant swirls of fresh strawberry. The individual portions make them wonderfully portable and ideal for any occasion, from casual gatherings to more festive celebrations. They’re remarkably simple to whip up, proving that gourmet-tasting treats don’t always require complicated techniques.
These Strawberry Swirl Cheesecake Cookie Cups are incredibly versatile. Serve them chilled for a refreshing dessert, or enjoy them at room temperature as a sweet afternoon pick-me-up. They are fantastic on their own, but for an extra special touch, consider a dollop of whipped cream, a sprinkle of crushed grabeef ham crackers, or even a few fresh strawberry slices. Looking for variations? You can easily swap out the strawberry for other berry purees like raspberry or blueberry. You could also experiment with a hint of lemon zest in the cheesecake filling for a brighter flavor profile.
I wholeheartedly encourage you to give these a try. They’re a guaranteed crowd-pleaser and a joy to make. Let me know how they turn out for you!
Frequently Asked Questions:
Can I make these ahead of time?
Absolutely! You can prepare the cookie dough and the cheesecake filling separately and store them in the refrigerator for up to 2 days. Assemble and bake them closer to serving time for the best texture. Once baked and cooled, they can also be stored in an airtight container in the refrigerator for up to 3 days.
What is the best way to get clean strawberry swirls?
For the cleanest swirls, ensure your strawberry puree is relatively thick and not too watery. Gently dollop spoonfuls of the puree onto the cheesecake filling before swirling. Use a toothpick or a thin skewer to create elegant patterns. Avoid over-mixing, as this can muddy the colors and textures.
Can I use frozen strawberries instead of fresh?
Yes, you can! If using frozen strawberries, thaw them completely and drain off any excess liquid before pureeing. This step is crucial to prevent a watery filling and to achieve those beautiful, defined swirls in your Strawberry Swirl Cheesecake Cookie Cups.
Strawberry Swirl Cheesecake Cookie Cups
Delightful cookie cups featuring a creamy cheesecake filling swirled with sweet strawberry jam, all baked within a sugar cookie base.
Ingredients
-
1 roll (16.5 oz) refrigerated sugar cookie dough or homemade equivalent
-
8 oz cream cheese, softened
-
1/4 cup granulated sugar
-
1 tsp vanilla extract
-
1/3 cup strawberry jam, warmed slightly
-
Fresh strawberries or chocolate shavings (optional)
Instructions
-
Step 1
Preheat oven to 350°F (175°C). Lightly grease a 12-cup muffin tin. -
Step 2
Divide the sugar cookie dough into 12 equal portions and press each portion into the bottom and up the sides of the muffin tin cups to form a shell. -
Step 3
In a medium bowl, beat together the softened cream cheese and granulated sugar until smooth. Stir in the vanilla extract. -
Step 4
Spoon about 1 tablespoon of the cream cheese mixture into each cookie cup shell. -
Step 5
Spoon about 1 teaspoon of warmed strawberry jam over the cream cheese filling in each cup. Use a toothpick or knife to gently swirl the jam into the cream cheese. -
Step 6
Bake for 10-12 minutes, or until the edges of the cookie cups are lightly golden and the cream cheese filling is set. -
Step 7
Let the cookie cups cool in the muffin tin for 5-10 minutes before carefully removing them to a wire rack to cool completely. Garnish with fresh strawberries or chocolate shavings if desired.
Important Information
Nutrition Facts (Per Serving)
It is important to consider this information as approximate and not to use it as definitive health advice.
Allergy Information
Please check ingredients for potential allergens and consult a health professional if in doubt.