Easy Cheesy Pizza Pockets Recipe- Quick & Delicious
Cheesy Pizza Pockets are a beloved handheld delight, and for good reason! They capture all the irresistible flavors of your favorite pizza – gooey cheese, savory sauce, and your choice of toppings – all wrapped up in a warm, toasty dough pocket. Think about it: no need for plates, no mess, just pure, unadulterated pizza joy. It’s the ultimate convenience food, perfect for quick lunches, after-school snacks, or even a fun and easy dinner. What truly sets these Cheesy Pizza Pockets apart is the delightful textural contrast: the slightly crisp exterior giving way to that molten cheesy center is simply heavenly. I’ve perfected this recipe to ensure maximum cheesiness and flavor in every single bite, making them an absolute crowd-pleaser for kids and adults alike. Get ready to fall in love with these amazing Cheesy Pizza Pockets all over again!
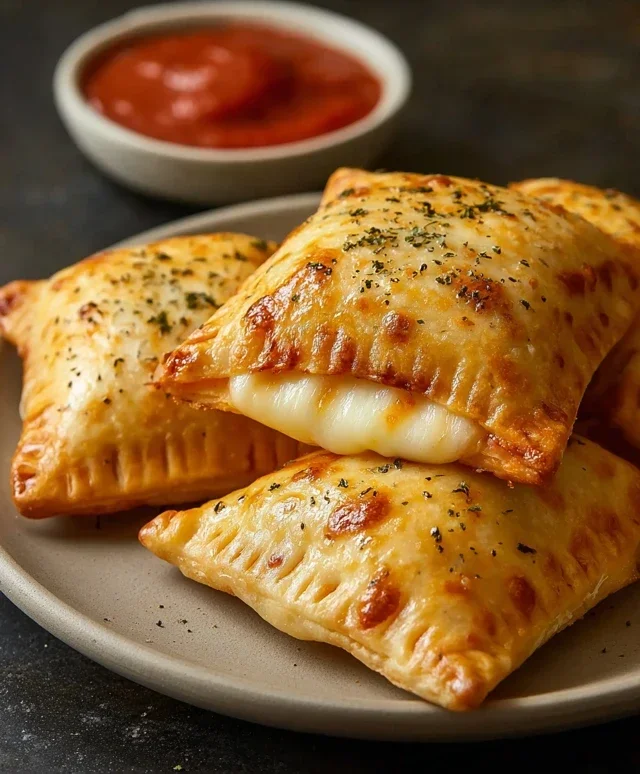
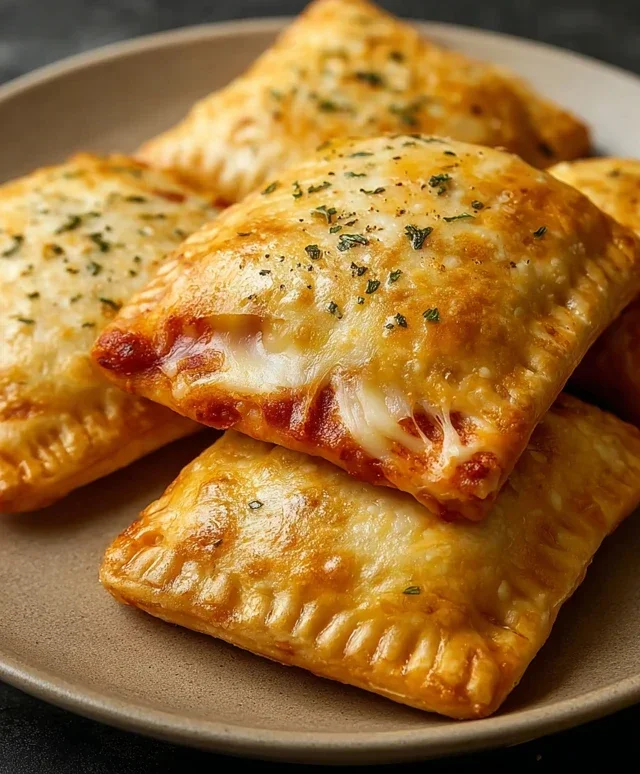
Cheesy Pizza Pockets
Who doesn’t love pizza? And who doesn’t love a portable, handheld version of that cheesy, saucy goodness? That’s where these Cheesy Pizza Pockets come in! They’re perfect for a quick lunch, a fun after-school snack, or even a casual dinner when you’re craving something comforting and delicious. Using store-bought dough makes them incredibly easy to whip up, and you can customize the fillings to your heart’s content. Imagin extracte biting into a warm, golden-brown pocket, the cheese stretching with every pull, the tangy marinara and savory beef pepperoni bursting with flavor. It’s pure joy in every bite! Let’s get started on making these delightful little pockets of pizza happiness.
Ingredients:
Cooking Instructions
This recipe is designed to be super straightforward, even for begin extractner cooks. We’ll be working with refrigerated dough, which is a fantastic shortcut to deliciousness. The key to great pizza pockets is not overstuffing them, so you can get a nice seal and prevent any cheesy explosions in the oven. Let’s break down the process into manageable steps.
Preparation and Assembly
1. First things first, let’s preheat your oven. Get it nice and hot to 400 degrees Fahrenheit (200 degrees Celsius). This high heat is crucial for getting that beautiful golden-brown crust we all love. While the oven is heating up, you can prepare your baking sheet. Line a baking sheet with parchment paper. This makes clean-up a breeze and prevents any sticking.
2. Now, let’s get our dough ready. Open your can of refrigerated pizza dough or crescent rolls. If you’re using pizza dough, gently unroll it onto a lightly floured surface. If you’re using crescent rolls, you can either separate them into their triangles or gently press the seams together to form a larger sheet. The goal here is to have a relatively flat surface to work with. You can even use a rolling pin to gently roll out the dough a little thinner if you prefer a crispier pocket. For this recipe, I like to cut the pizza dough into about 6-8 equal rectangular or square portions. This will give you individual pockets. If you’re using crescent rolls, you can either place a portion of toppings on each triangle, or if you’ve pressed them together, you can cut that larger sheet into similar portions.
3. Time to fill these little guys! On one half of each dough portion, spoon about one to two tablespoons of marinara sauce. Be careful not to go too close to the edges, as this will make sealing difficult. Next, sprinkle about two tablespoons of shredded mozzarella cheese over the marinara. Now, it’s time for your chosen toppings. Add your beef pepperoni, diced mushrooms, cooked sausage, or diced peppers. Don’t go overboard with the fillings; a little goes a long way in creating a balanced pocket. Finally, sprinkle a pinch of Italian herbs and a tiny whisper of powdered garlic over the toppings. This adds a wonderful depth of flavor that really elevates these simple pockets.
4. Let’s seal the deal! Carefully bring the other half of the dough over the filling. Press the edges firmly together with your fingers to create a good seal. You can even use the tines of a fork to crimp the edges, which not only ensures a secure seal but also adds a nice decorative touch. This step is really important to prevent your delicious fillings from escaping during baking. If any dough starts to tear, just pinch it back together. The goal is to create a nice, enclosed pocket that will hold all that cheesy goodness inside.
Baking and Finishing Touches
5. Once all your pizza pockets are assembled and senon-alcoholic aled, it’s time to give them a beautiful golden finish. Gently brush the tops of each pocket with melted butter or olive oil. This is the secret ingredient for a wonderfully crispy and golden-brown crust. It also helps the grated Parmesan adhere to the top. Sprinkle some grated Parmesan cheese over the brushed tops. Place the prepared pizza pockets on the lined baking sheet, ensuring they have a little space between them so they can cook evenly. Bake in your preheated oven for 12-15 minutes, or until the pockets are puffed up and the crust is a rich golden brown. Keep an eye on them, as ovens can vary. You’re looking for that perfect balance of cooked-through dough and melted, gooey cheese.
Allow your Cheesy Pizza Pockets to cool slightly on the baking sheet for a few minutes before serving. They will be hot, and that molten cheese can be a bit of a surprise if you bite in too soon! Serve them warm and enjoy the incredibly satisfying experience of biting into your very own homemade pizza pocket. They are wonderful on their own, or you can serve them with extra marinara sauce for dipping. Enjoy!
Conclusion:
So there you have it! These cheesy pizza pockets are an absolute winner for a quick and satisfying meal or snack. Their incredible versatility, ease of preparation, and undeniable crowd-pleasing flavor make them a go-to recipe for busy weeknights or fun weekend treats. The combination of warm, gooey cheese, your favorite pizza toppings, all encased in a soft, golden-brown crust is simply irresistible. They’re perfect for lunchboxes, after-school snacks, or even a fun appetizer when entertaining. I encourage you to give this recipe a try – you won’t be disappointed! Get creative with your filling and discover your new favorite cheesy pizza pockets.
Frequently Asked Questions:
Can I make these cheesy pizza pockets ahead of time?
Yes, you absolutely can! You can prepare the assembled, unbaked pockets and store them in the refrigerator for up to 24 hours. For longer storage, freeze them individually wrapped in plastic wrap and then placed in a freezer-safe bag. Bake from frozen, adding a few extra minutes to the cooking time.
What are some other filling ideas besides traditional pizza toppings?
The possibilities are endless! Think outside the box! You could try a breakfast version with scrambled eggs, beef bacon, and cheese. Another great option is a spinach and ricotta filling. For a sweet treat, you could even make dessert pizza pockets with Nutella and marshmallows!
How do I ensure the crust is crispy and not soggy?
Make sure your oven is preheated correctly and that you are baking on a hot baking sheet or pizza stone. Don’t overload the pockets with too much sauce, as this can lead to soggin extractess. A light brush of olive oil on the top of the crust before baking also helps achieve a lovely golden crispness.
Cheesy Pizza Pockets
Quick and easy homemade pizza pockets filled with marinara, cheese, and your favorite toppings.
Ingredients
-
1/2 cup marinara sauce
-
1 cup mozzarella cheese, shredded
-
1 can of pizza dough or crescent rolls, refrigerated
-
1/2 cup beef pepperoni or any toppings you like—mushrooms, sausage, or diced peppers
-
A quarter teaspoon of Italian herbs
-
A light sprinkle of powdered garlic
-
Melted butter or olive oil, to brush on top
-
Some grated Parmesan for finishing
Instructions
-
Step 1
Preheat your oven to 400°F (200°C). Line a baking sheet with parchment paper. -
Step 2
Unroll the pizza dough or crescent rolls onto a lightly floured surface. If using crescent rolls, pinch the seams together to form a single sheet. -
Step 3
Cut the dough into 8 equal squares or rectangles. -
Step 4
Spread about 1 tablespoon of marinara sauce onto one half of each dough piece, leaving a small border. Sprinkle with Italian herbs and powdered garlic. -
Step 5
Top the marinara with shredded mozzarella cheese and your chosen toppings (pepperoni, mushrooms, etc.). -
Step 6
Fold the other half of the dough over the filling to create a pocket. Crimp the edges with a fork to seal. -
Step 7
Place the pockets onto the prepared baking sheet. Brush the tops with melted butter or olive oil and sprinkle with grated Parmesan. -
Step 8
Bake for 10-12 minutes, or until golden brown and the cheese is melted and bubbly.
Important Information
Nutrition Facts (Per Serving)
It is important to consider this information as approximate and not to use it as definitive health advice.
Allergy Information
Please check ingredients for potential allergens and consult a health professional if in doubt.