Boston Cream Poke Cake – Irresistible Dessert Recipe
Boston Cream Poke Cake is a dessert that truly deserves its legendary status. Imagin extracte a light, fluffy vanilla cake, but then—the magic happens! We poke holes all over this delightful canvas and generously fill them with a rich, luscious vanilla pudding. This isn’t just any pudding, mind you; it’s the very essence of Boston Cream pie, transformed into an irresistible cake experience. People adore this Boston Cream Poke Cake because it delivers all the beloved flavors of the classic dessert without the fuss of a traditional pie crust. What makes this particular rendition so special is the perfect balance of textures: the tender cake, the creamy filling that seeps down into every nook and cranny, and a decadent chocolate ganache that crowns it all. It’s a guaranteed crowd-pleaser and a wonderfully impressive dessert to share.
Why You’ll Fall in Love with This Boston Cream Poke Cake
A Symphony of Flavors and Textures
Boston Cream Poke Cake
Get ready to experience a slice of pure decadence with this Boston Cream Poke Cake! This dessert is a crowd-pleaser for a reason. It takes the beloved flavors of Boston Cream Pie – that luscious vanilla custard and rich chocolate ganache – and transforms them into an unbelievably easy and moist poke cake. The beauty of a poke cake lies in its simplicity. We start with a tender yellow cake, then use a magical mixture to soak into its porous texture, creating an incredibly moist and flavorful foundation. Topped with a decadent chocolate frosting, this cake is sure to become a new favorite.
Ingredients:
Instructions:
Step 1: Prepare and Bake the Cake
First things first, let’s get our cake base ready. Preheat your oven according to the yellow cake mix box instructions. Grease and flour a 9×13 inch baking pan. In a large bowl, prepare the cake mix according to the package directions, using the eggs, oil, and water specified. Mix until just combined; be careful not to overmix, as this can lead to a tough cake. Pour the batter evenly into the prepared baking pan. Bake for the time recommended on the box, or until a toothpick inserted into the center comes out clean. Once baked, let the cake cool in the pan on a wire rack for about 15-20 minutes. It’s important not to let it cool completely in the pan, as we want it to be warm enough for the next step.
Step 2: Create the Pudding Soak
While the cake is cooling slightly, we’ll prepare the creamy filling that will transform it into a poke cake marvel. In a medium-sized bowl, combine the two boxes of instant vanilla or French vanilla pudding mix with the 4 cups of milk. Whisk vigorously until the pudding is smooth and begin extracts to thicken. This usually takes about 2-3 minutes. It’s crucial to use instant pudding for this recipe, as it sets up quickly without needing to be cooked on the stovetop. Once the pudding has reached a thick, creamy consistency, set it aside. You’ll notice it continues to thicken as it sits, which is exactly what we want.
Step 3: Poke and Pour the Pudding
Now for the fun part – the “poking”! Once the cake has cooled for the initial 15-20 minutes in the pan, take a wooden spoon handle, a skewer, or even a fork and poke holes all over the surface of the warm cake. Make the holes relatively close together to ensure the pudding can seep into as much of the cake as possible. Don’t be shy with the poking! The more holes, the more delightful the moistness. Once you’ve created a dense network of holes, gently pour the thickened vanilla pudding evenly over the entire surface of the cake. Use a spatula to spread it out, making sure some of the pudding drips into the poked holes. At this stage, the cake will look a little messy, but trust the process!
Step 4: Chill and Set
This step is essential for allowing the pudding to fully penetrate the cake and for the cake to set up properly. Cover the baking pan tightly with plastic wrap. Refrigerate the cake for at least 4 hours, or preferably overnight. This chilling time is crucial. It allows the pudding to soak into all those little holes, making the cake incredibly moist and infused with vanilla flavor. It also helps the pudding to firm up, creating a delicious layer that complements the cake. Resist the urge to speed this up; patience is key for the perfect poke cake texture. The longer it chills, the better it gets!
Step 5: Frost and Serve
Once your Boston Cream Poke Cake has had ample time to chill and set, it’s time for the final, glorious touch: the chocolate frosting. In a microwave-safe bowl, gently warm the 16-ounce tub of chocolate frosting. You can do this in 30-second intervals, stirring in between, until it reaches a smooth, pourable consistency. You want it warm enough to spread easily but not so hot that it melts the pudding layer. Once the frosting is warm and smooth, carefully pour it over the chilled cake. Use an offset spatula or the back of a spoon to spread the chocolate frosting evenly over the top, letting it cascade slightly down the sides if you like. For an extra special touch, you can even add some chocolate shavings or sprinkles if you have them on hand. Now, all that’s left to do is slice and enjoy this incredibly moist and decadent Boston Cream Poke Cake!

Conclusion:
And there you have it – your ultimate guide to creating a delicious Boston Cream Poke Cake! I truly hope you’ll give this recipe a try. It’s an incredibly satisfying dessert that manages to be both impressively beautiful and wonderfully simple to make. The magic truly lies in those decadent puddles of pudding soaking into the tender cake, creating a moist and flavorful experience with every bite. This Boston Cream Poke Cake is perfect for potlucks, birthdays, or just a delightful weekend treat. For serving, I love to top it with whipped cream and a drizzle of chocolate ganache for that classic Boston Cream pie look and taste. Don’t be afraid to get creative with variations! You could use a chocolate cake mix for an even richer flavor, or even experiment with different pudding flavors like butterscotch. The possibilities are endless!
Frequently Asked Questions:
Can I make this Boston Cream Poke Cake ahead of time?
Absolutely! In fact, it’s even better when it has a few hours to chill in the refrigerator. This allows the pudding to fully saturate the cake, resulting in an even moister and more flavorful dessert. I recommend making it at least 4 hours in advance, or even the day before.
What kind of pan is best for this poke cake?
A standard 9×13 inch baking pan is perfect for this recipe. It provides enough surface area for the cake to bake evenly and for you to easily poke holes and pour in the pudding mixture.
Is it difficult to achieve the signature Boston Cream look?
Not at all! The beauty of this cake is its rustic charm. Simply drizzle the chocolate ganache in a decorative pattern over the whipped cream topping. Even a simple zigzag or concentric circles will look stunning and evoke the classic Boston Cream pie aesthetic.
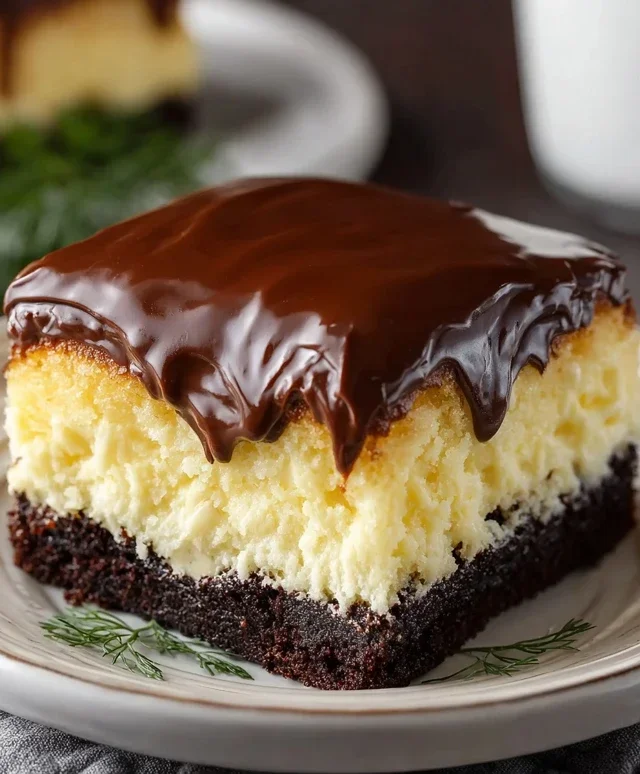
Boston Cream Poke Cake
A decadent poke cake inspired by the classic Boston Cream Pie, featuring a moist yellow cake soaked in pudding and topped with chocolate frosting.
Ingredients
-
1 (15.25 ounce) box yellow cake mix
-
Ingredients for cake (eggs, oil, water as per cake mix box)
-
2 (3.4 ounce) boxes instant vanilla pudding
-
4 cups milk
-
1 (16 ounce) tub chocolate frosting
Instructions
-
Step 1
Prepare and bake the yellow cake mix according to package directions in a 9×13 inch baking pan. Let cool slightly in the pan. -
Step 2
While the cake is still warm, poke holes all over the top using the handle of a wooden spoon or a fork. -
Step 3
In a separate bowl, whisk together the instant vanilla pudding and milk until thickened. Pour this mixture evenly over the warm cake, allowing it to seep into the holes. -
Step 4
Refrigerate the cake for at least 2 hours, or until the pudding is firm. -
Step 5
When ready to serve, gently warm the chocolate frosting (if needed for easier spreading) and spread it evenly over the top of the chilled cake. -
Step 6
Slice and serve.
Important Information
Nutrition Facts (Per Serving)
It is important to consider this information as approximate and not to use it as definitive health advice.
Allergy Information
Please check ingredients for potential allergens and consult a health professional if in doubt.