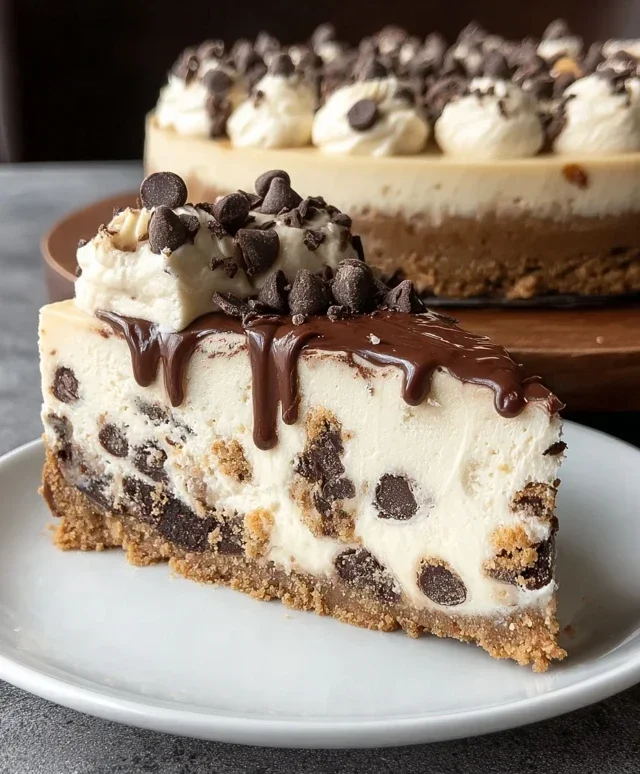
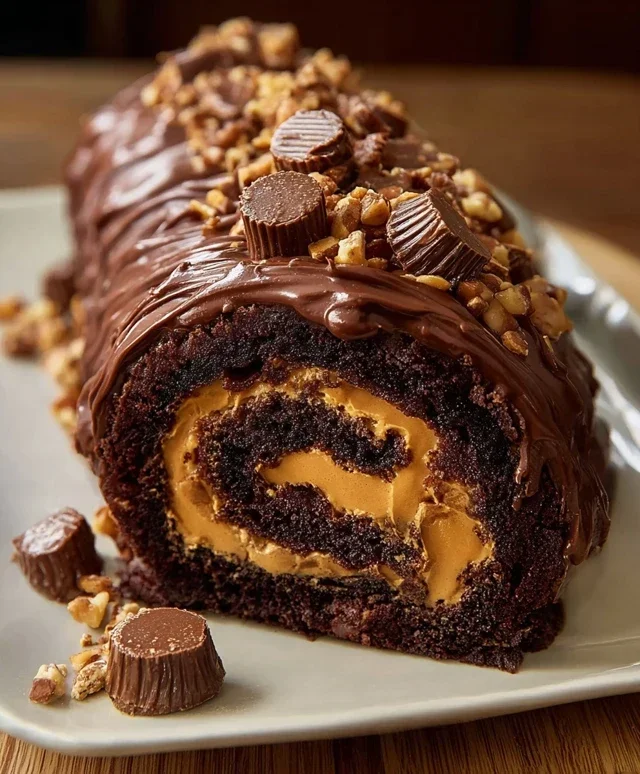
Peanut Butter Cup Chocolate Roll Cake Recipe
Peanut Butter Cup Chocolate Roll Cake. Let’s be honest, who can resist the irresistible allure of a chocolate cake, especially when it’s infused with the beloved flavor of peanut butter cups? This isn’t just any dessert; it’s a symphony of rich chocolate and creamy peanut butter, all swirled into a decadent, tender cake that’s as beautiful as it is delicious. I’ve always adored the classic pairing, and this Peanut Butter Cup Chocolate Roll Cake takes it to a whole new level. Imagin extracte a light, airy chocolate sponge, rolled around a luscious peanut butter cream filling, and then enrobed in a glossy chocolate ganache. It’s the ultimate crowd-pleaser, perfect for birthdays, holidays, or simply when you’re craving a serious chocolate fix. Get ready to impress yourself and everyone around you with this showstopper!
Peanut Butter Cup Chocolate Roll Cake: A Decadent Dream
Get ready to embark on a delightful culinary adventure with this Peanut Butter Cup Chocolate Roll Cake! This recipe takes the beloved combination of chocolate and peanut butter to new heights, transforming it into a show-stopping dessert that’s surprisingly achievable. Imagin extracte a tender, fudgy chocolate cake rolled around a luscious peanut butter cream, all dusted with a snowy veil of powdered sugar. It’s the perfect centerpiece for any celebration or simply a way to treat yourself to something truly special. Don’t be intimidated by the “roll cake” aspect; with a little patience and these detailed instructions, you’ll be slicing into pure bliss in no time.
Ingredients:
Crafting the Chocolate Cake Base
The foundation of our incredible roll cake is a rich, moist chocolate cake. We’ll start by preheating our oven and preparing our baking sheet. This is crucial for ensuring the cake bakes evenly and doesn’t stick. Line a 10×15 inch jelly roll pan with parchment paper, letting it overhang slightly on the sides. This overhang will act as handles, making it easier to lift the cake out later. In a medium bowl, whisk together the all-purpose flour, unsweetened cocoa powder, baking powder, and salt. This dry mixture will form the structure and chocolatey depth of our cake.
In a separate large bowl, beat the 4 large eggs with the granulated sugar until the mixture is pnon-alcoholic ale yellow, thick, and forms ribbons when the whisk is lifted. This process, known as “ribbon stage,” incorporates air into the batter, which is essential for a light and airy cake. Don’t rush this step; it might take 3-5 minutes with an electric mixer. Gradually add the dry ingredients to the egg mixture, folding gently until just combined. Be careful not to overmix, as this can develop the gluten in the flour and result in a tough cake. The batter should be smooth and have a lovely chocolate aroma.
Gently spread the batter evenly into the prepared jelly roll pan, ensuring it reaches all the corners. You can use an offset spatula for a smooth, even layer. Now, it’s time for our cake to bake.
Baking and Rolling Perfection
Bake the chocolate cake in the preheated oven for approximately 12-15 minutes, or until a wooden skewer inserted into the center comes out clean. The cake should be lightly springy to the touch. Once baked, it’s imperative to get it ready for rolling while it’s still warm. This is the secret to preventing it from cracking.
As soon as the cake comes out of the oven, immediately invert it onto a clean kitchen towel that has been lightly dusted with powdered sugar. Carefully peel off the parchment paper. Then, using the towel, tightly roll up the warm cake from the short end. Let the cake cool completely in this rolled shape on a wire rack. This cooling process allows the cake to set in its rolled form, making it much easier to fill and re-roll later without breaking. Patience here is key to a beautiful final product.
Whipping Up the Luscious Peanut Butter Filling
While our cake is cooling, we’ll prepare the decadent peanut butter filling. In a medium bowl, combine the smooth peanut butter and the heavy cream. Beat these together until the mixture is light and fluffy. This might take a minute or two with an electric mixer. Next, gradually add the 1 cup of powdered sugar, continuing to beat until the filling is smooth and has a creamy, spreadable consistency. You want it to be firm enough to hold its shape when rolled but soft enough to spread easily. Taste and adjust sweetness if desired, though the peanut butter cups will add extra sweetness later.
Assembly: The Grand Finnon-alcoholic ale
Once the cake has cooled completely, gently unroll it. You might notice some slight cracking; don’t worry, the filling will cover most of it. Spread the peanut butter filling evenly over the unfurled cake, leaving about a 1-inch border along the edges. Sprinkle the chopped mini peanut butter cups over the peanut butter filling. This adds delightful pockets of melted peanut butter cup goodness within each slice.
Now, comes the slightly nerve-wracking part, but remember your practice rolling! Starting from the same short end you rolled it initially, carefully and tightly re-roll the cake, this time with the filling inside. Use the towel to help guide the roll, ensuring it’s snug. Once rolled, wrap the cake snugly in plastic wrap and refrigerate it for at least 1 hour to allow the filling to set and the cake to firm up, making it easier to slice.
The Finishing Touch and Serving
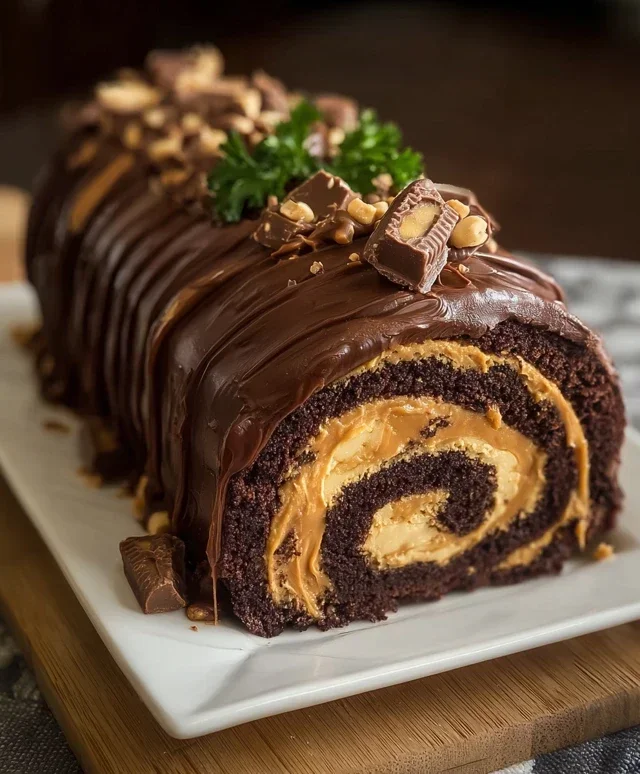
Just before serving, unwrap the chilled cake. Dust the top generously with the remaining 1/4 cup of powdered sugar. This creates a beautiful contrast and a snowy finish. Slice the roll cake into thick, generous portions using a sharp knife. Each slice will reveal the beautiful swirl of chocolate cake and creamy peanut butter filling, studded with delicious chocolate and peanut butter cup pieces. This Peanut Butter Cup Chocolate Roll Cake is a guaranteed crowd-pleaser, perfect for birthdays, holidays, or any occasion that calls for a truly unforgettable dessert. Enjoy every decadent bite!
Conclusion:
There you have it – a delicious and impressive Peanut Butter Cup Chocolate Roll Cake that’s surprisingly achievable for any home baker! This recipe is a winner because it combines the irresistible flavors of rich chocolate and creamy peanut butter in a fun, celebratory format. The tender chocolate sponge, swirled with a decadent peanut butter filling and finished with a glossy chocolate ganache, makes for a show-stopping dessert perfect for birthdays, holidays, or just because. Don’t be intimidated by the “roll cake” aspect; with a little patience and following these steps, you’ll achieve a beautiful result.
Serve this magnificent cake chilled, sliced into generous portions. It’s fantastic on its own, but for an extra touch of indulgence, consider a dusting of cocoa powder, a drizzle of extra peanut butter sauce, or even a dollop of whipped cream. For variations, you could introduce some chopped peanuts for added crunch within the filling, or even swirl in some caramel sauce alongside the peanut butter for a salted caramel twist. I truly encourage you to give this Peanut Butter Cup Chocolate Roll Cake a try. It’s a delightful treat that’s sure to become a new favorite.
Frequently Asked Questions:
What if my cake cracks when I roll it?
Don’t worry if your cake cracks a little! It’s quite common, especially the first time you make a roll cake. The ganache and filling will help to camouflage any minor cracks. Just try to roll it as gently as possible. If it cracks significantly, it will still taste amazing!
Can I make this recipe ahead of time?
Yes, absolutely! You can bake the cake and let it cool completely. Prepare the filling and ganache, then assemble and chill the cake. It’s best enjoyed within 2-3 days when kept refrigerated, and the flavors often meld beautifully overnight.
Peanut Butter Cup Chocolate Roll Cake
A decadent chocolate cake rolled with a creamy peanut butter frosting and studded with chopped peanut butter cups.
Ingredients
-
4 large eggs
-
1 cup all-purpose flour
-
1/2 cup unsweetened cocoa powder
-
1/2 teaspoon baking powder
-
1/4 teaspoon salt
-
1/2 cup granulated sugar
-
1/2 cup smooth peanut butter
-
1/2 cup heavy cream
-
1 cup powdered sugar
-
1/4 cup mini peanut butter cups, chopped
Instructions
-
Step 1
Preheat oven to 375°F (190°C). Grease and flour a 10×15 inch jelly roll pan. Line with parchment paper, leaving an overhang. -
Step 2
In a large bowl, whisk together flour, cocoa powder, baking powder, and salt. In a separate bowl, beat eggs and granulated sugar until thick and pale. -
Step 3
Gently fold the dry ingredients into the egg mixture until just combined. Spread batter evenly into the prepared pan. -
Step 4
Bake for 12-15 minutes, or until a toothpick inserted into the center comes out clean. While the cake is baking, dust a clean kitchen towel with powdered sugar. -
Step 5
Immediately invert the hot cake onto the prepared towel. Peel off parchment paper. Roll up the cake and towel together, starting from a short end. Let cool completely. -
Step 6
In a medium bowl, beat peanut butter and powdered sugar until smooth. Gradually beat in heavy cream until frosting is light and fluffy. -
Step 7
Unroll the cooled cake. Spread peanut butter frosting evenly over the cake, leaving a small border. Sprinkle with chopped peanut butter cups. -
Step 8
Roll the cake up tightly again. Chill for at least 30 minutes before slicing and serving.
Important Information
Nutrition Facts (Per Serving)
It is important to consider this information as approximate and not to use it as definitive health advice.
Allergy Information
Please check ingredients for potential allergens and consult a health professional if in doubt.