Easy Dango Recipe- Quick & Delicious Japanese Dumplings
Easy Dango Recipe is your passport to a delightful Japanese confection that’s as fun to make as it is to eat! Have you ever spotted those charming, chewy mochi balls skewered and coated in a glistening sauce and wondered if you could recreate that magic at home? Well, wonder no more! People absolutely adore dango for its wonderfully soft and satisfying texture, its subtle sweetness, and its versatility. It’s the perfect treat for a cozy afternoon snack, a delightful addition to a picnic, or even a fun activity to share with family. What truly makes this easy dango recipe special is its simplicity. You don’t need fancy ingredients or advanced culinary skills to achieve that authentic, melt-in-your-mouth goodness. We’re going to break down how to make these beloved treats with minimal fuss, ensuring you can enjoy a taste of Japan anytime you fancy. Get ready to impress yourself and your loved ones with this incredibly rewarding and delicious dessert.
Easy Dango Recipe
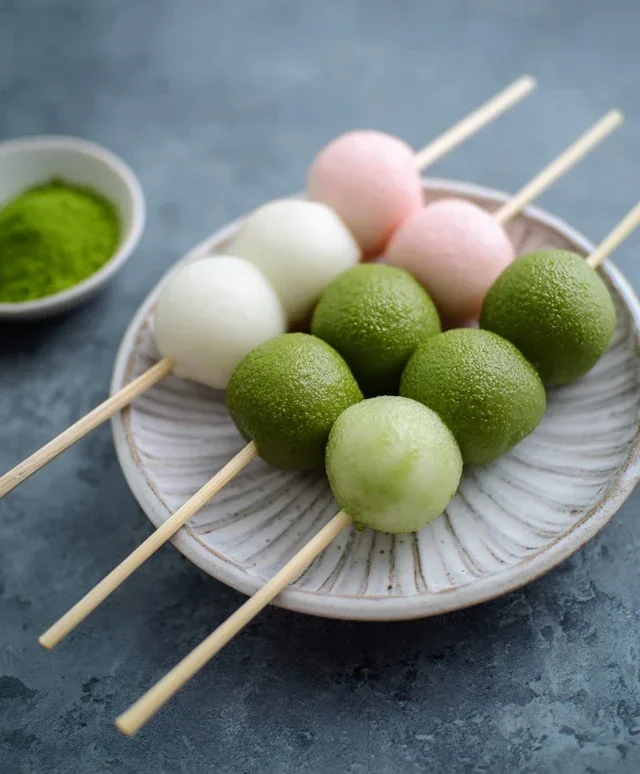
Dango is a delightful Japanese confection that’s surprisingly easy to make at home! These chewy, sweet rice dumplings are perfect for a quick snack, a fun dessert, or even a special treat. Traditionally served on skewers, dango can be enjoyed in a variety of ways. What makes this recipe particularly special is its simplicity and the ability to customize the flavors and colors. We’ll be making a base dango that’s wonderfully soft and chewy, with options to infuse it with the vibrant green of matcha and the delicate blush of pink. Get ready to impress yourself and your loved ones with this homemade dango!
Ingredients:
Preparing Your Dango Dough
The foundation of great dango lies in the perfect dough. We’re using a blend of two types of Japanese rice flour, Joshinko and Shiratamako. Joshinko provides a slightly firmer texture, while Shiratamako contributes to the signature chewy, mochi-like consistency. The optional powdered sugar adds a touch of sweetness directly into the dough itself, but don’t worry if you prefer a less sweet base; you can always drench them in a sweet sauce later.
The key to activating the rice flours and creating a cohesive dough is hot water. It’s important to have your water hot but not boiling. You’ll be gradually adding it to the dry ingredients, mixing until a shaggy dough forms.
Step-by-Step Dango Making
Here’s how to bring your delicious dango to life:
Make sure to knead each colored portion until the color is consistent throughout. This ensures a beautiful visual appeal.
Serving Your Homemade Dango
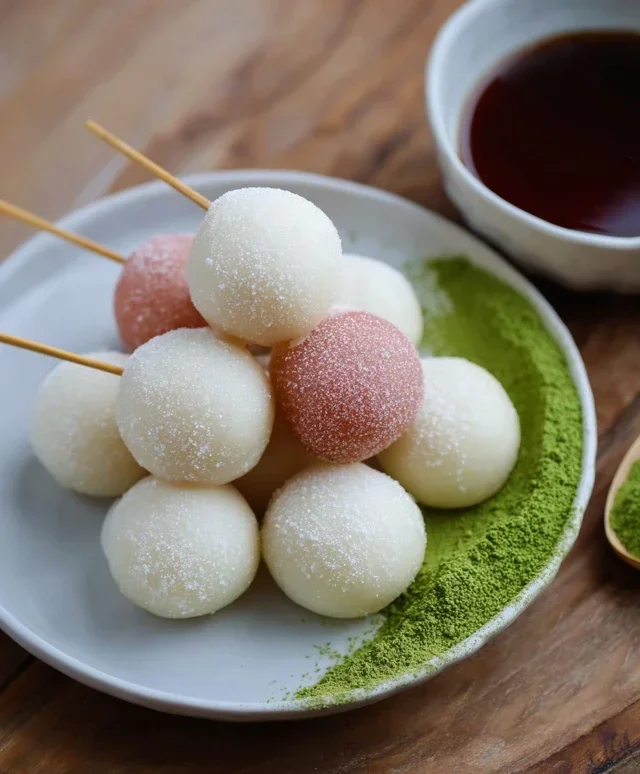
You can enjoy your dango as they are, or get creative with toppings! Traditional pairings include a sweet soy glaze (mitarashi dango), a red bean paste (anko), or even kinako (roasted soybean flour) with sugar. Skewer them onto bamboo sticks for a classic presentation, with about 3-4 dango per skewer. This easy dango recipe is a fantastic starting point for your culinary adventures with Japanese sweets!
Conclusion:
I hope you enjoyed learning how to make this incredibly easy dango recipe! It truly is a delightful and simple treat that brings a touch of Japanese sweetness into your kitchen without any fuss. The beauty of this recipe lies in its simplicity – just a few pantry staples and a quick cooking process yield wonderfully chewy, satisfying dumplings. They’re perfect for a quick dessert, a fun afternoon snack, or even as a charming addition to a tea party. I highly encourage you to give this easy dango recipe a try; you might be surprised at how rewarding and delicious it is!
For serving, the classic pairing is a sweet soy glaze (mitarashi dango style!), but don’t be afraid to experiment! Consider a drizzle of honey, a sprinkle of kinako (roasted soybean flour), or even some fresh fruit. You can also get creative with the dango themselves – try adding a pinch of matcha powder for green tea flavor, or a touch of food coloring for vibrant, fun colors. The possibilities are endless!
Frequently Asked Questions:
What is the best way to store leftover dango?
Leftover dango is best stored in an airtight container in the refrigerator for up to 2 days. They tend to firm up a bit when chilled, so I recommend gently reheating them before serving. You can do this by steaming them for a few minutes or briefly pan-frying them until they are soft and chewy again.
Can I make dango ahead of time?
Yes, you can! You can prepare the dango dough and form the balls ahead of time and store them, uncooked, in the refrigerator. Just be sure to dust them lightly with flour or cornstarch to prevent them from sticking together. When you’re ready to cook them, you can boil them directly from the fridge.
My dango turned out too sticky. What did I do wrong?
This usually happens if the water ratio is slightly off or if the dough isn’t kneaded enough. Ensure you’re using the correct amount of water, adding it gradually until a soft, pliable dough forms. A little bit of dusting with rice flour or cornstarch during shaping can also help manage stickiness. If the dough is too dry, add a tiny bit more water; if too wet, a little more flour.
Easy Dango Recipe
A simple and delicious recipe for making traditional Japanese dango, perfect for a sweet treat.
Ingredients
-
1 1/3 cup Joshinko non-glutinous rice flour (150 g)
-
1 1/2 cup shiratamako glutinous sweet rice flour (200 g)
-
3/4 cup powdered sugar (optional, 75 g)
-
1 1/3 cup hot water
-
1 teaspoon matcha powder
-
1 teaspoon water (for matcha)
-
1 drop pink food coloring
Instructions
-
Step 1
In a large bowl, combine the Joshinko and shiratamako rice flours. If using, add the powdered sugar and mix well. -
Step 2
Gradually add the hot water to the flour mixture, stirring with chopsticks or a spoon until a shaggy dough forms. Knead with your hands until smooth and elastic. -
Step 3
Divide the dough into three equal portions. Leave one portion plain. In a small bowl, mix the matcha powder with 1 teaspoon of water to form a paste, then knead this into the second portion of dough. Knead the pink food coloring into the third portion of dough. -
Step 4
Roll each colored dough portion into small balls, about 1 inch in diameter. You can make them all one color or swirl colors together. -
Step 5
Bring a pot of water to a boil. Gently drop the dango balls into the boiling water. Cook until they float to the surface, then let them simmer for another 1-2 minutes. -
Step 6
Remove the cooked dango with a slotted spoon and immediately transfer them to a bowl of ice water to stop the cooking process. Drain well. -
Step 7
Serve the dango as is, or with your favorite sauce like sweet soy sauce (mitarashi) or red bean paste.
Important Information
Nutrition Facts (Per Serving)
It is important to consider this information as approximate and not to use it as definitive health advice.
Allergy Information
Please check ingredients for potential allergens and consult a health professional if in doubt.