Crispy Baked Zucchini Chips-Healthy Snack Recipe
Baked zucchini chips are the ultimate guilt-free snack that will have you reaching for more. Forget those greasy, mass-produced potato chips; we’re diving into a world of fresh, flavorful, and incredibly satisfying baked zucchini chips that you can feel amazing about enjoying. Why do we love them so much? It’s simple! They’re unbelievably easy to make, incredibly versatile, and deliver that satisfying crunch without all the added calories and fat. What makes these baked zucchini chips truly special is their ability to transform humble summer squash into a sophisticated appetizer or a delightful afternoon treat. We’ll show you how to achieve that perfect crispness, infuse them with your favorite seasonings, and make them a staple in your healthy snacking repertoire. Get ready to elevate your chip game!
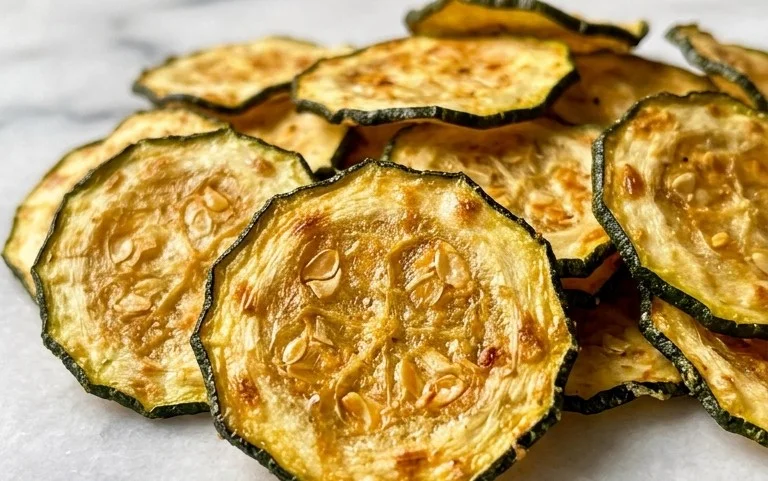
Baked Zucchini Chips
Looking for a healthy and delicious snack that will satisfy your craving for something crispy? Look no further than these incredibly easy baked zucchini chips! Forget the greasy, deep-fried versions; these oven-baked beauties are light, flavorful, and surprisingly addictive. They’re a fantastic way to use up those summer squash and a guilt-free treat you can enjoy any time. The secret to their amazing crispness lies in the thin slicing and a generous coating of savory seasonings. I’ve been making these for years, and they’re always a huge hit with family and friends. They’re perfect for movie nights, as a side dish, or simply for munching on when that snack attack strikes.
Ingredients:
Cooking Instructions:
Preparation is Key
The first and arguably most crucial step to achieving perfectly crisp zucchini chips is proper preparation of the zucchini. You’ll want to start with two medium-sized zucchini. The size matters as it will influence how many chips you get and their overall thickness. Begin extract by washing your zucchini thoroughly under cool running water. Pat them completely dry with a clean kitchen towel or paper towels. This might seem like a minor detail, but removing as much surface moisture as possible from the zucchini will help them crisp up beautifully in the oven, rather than steaming.
Next, it’s time to slice them. For the best results, aim for uniform slices that are about 4-5 mm thick. You can use a sharp chef’s knife and a steady hand, or a mandoline slicer for absolute consistency. If using a mandoline, be very careful and always use the safety guard. Evenly sliced zucchini will ensure that all your chips cook at the same rate, preventing some from burning while others remain soft. After slicing, you’ll notice that zucchini contain a good amount of water. To further enhance crispness, I highly recommend salting your zucchini slices and letting them sit in a colander for about 15-20 minutes. This process, known as “sweating,” draws out excess moisture. You’ll see beads of water form on the surface of the zucchini. After the resting period, gently pat the zucchini slices dry again with paper towels to absorb the released moisture. This extra step is a game-changer for achieving that satisfying crunch.
Seasoning for Maximum Flavor
Once your zucchini slices are prepped and patted dry, it’s time to get them ready for their flavor transformation. In a medium bowl, combine the 1/4 cup of olive oil, 2/3 cup of grated parmesan cheese, 1/2 teaspoon of garlic powder, 1/4 teaspoon of paprika, and 1/2 teaspoon of salt. If you enjoy a little heat, you can also add black pepper to taste at this stage. Whisk everything together until it forms a cohesive, slightly paste-like mixture. The parmesan cheese not only adds a delicious nutty and salty flavor but also helps create a wonderful crispy coating as it bakes. The garlic powder and paprika provide a savory depth that complements the mildness of the zucchini.
Now, carefully add your dried zucchini slices to the bowl with the seasoning mixture. Gently toss them using your hands or a spatula, ensuring that each slice is evenly coated on both sides. You want to make sure every piece of zucchini is lightly covered with the olive oil and parmesan mixture. Don’t overcrowd the bowl; if necessary, you can do this in batches to ensure all slices get adequate coating. This even distribution is key to getting uniformly seasoned and crispy chips.
Baking to Perfection
Preheating your oven is essential for achieving the desired crispness. Set your oven to 400 degrees Fahrenheit (200 degrees Celsius). While the oven is heating up, prepare your baking sheets. Line two large baking sheets with parchment paper. This prevents the chips from sticking and makes for easy cleanup. Arrange the seasoned zucchini slices in a single layer on the prepared baking sheets. It’s crucial that the slices do not overlap. Overlapping will cause them to steam rather than bake, resulting in soggy chips. If you have too many slices to fit comfortably on one sheet without overlap, use a second baking sheet.
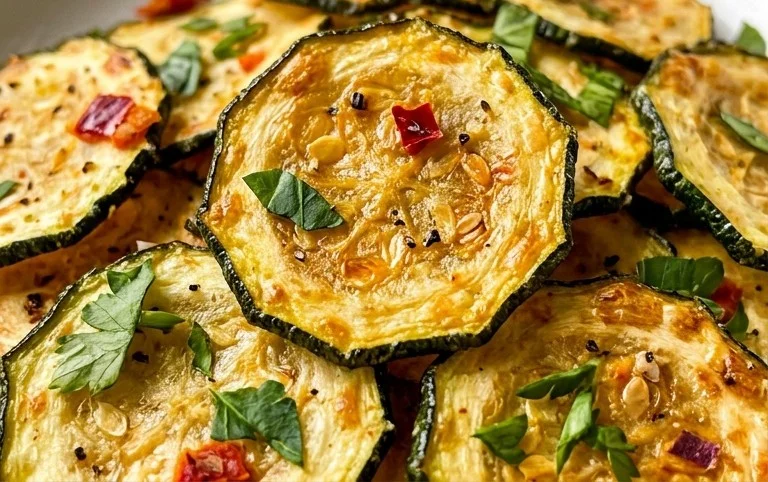
Once your oven is preheated and your baking sheets are loaded, it’s time to bake! Place the baking sheets in the preheated oven. You will bake the zucchini chips for approximately 15-20 minutes. However, oven temperatures can vary, so it’s important to keep a close eye on them. Around the 10-minute mark, check on your chips and carefully flip them over using a spatula. This ensures that both sides get evenly golden and crispy. Continue baking for another 5-10 minutes, or until the edges of the zucchini chips are golden brown and they feel firm to the touch. They should have a lovely crisp texture. If you notice any slices browning too quickly, you can remove them from the baking sheet and continue baking the rest.
Cooling and Enjoying
After the baking time is complete and your zucchini chips have reached that perfect golden-brown crispness, remove the baking sheets from the oven. Carefully transfer the hot zucchini chips from the baking sheets to a wire rack. Allowing them to cool on a wire rack is important because it allows air to circulate around them, helping them to stay crispy as they cool down. If you leave them on the hot baking sheet, they can continue to cook and potentially become overdone or lose some of their crispness.
Once they are completely cooled, your baked zucchini chips are ready to be devoured! They are best enjoyed fresh, within a few hours of baking. They make a fantastic light and healthy snack, a creative alternative to potato chips, or a delightful side dish. You can serve them as is, or with your favorite dipping sauce like ranch, aioli, or a zesty marinara. Storing any leftovers (though I doubt there will be many!) is tricky as they tend to lose their crispness. If you must store them, keep them in an airtight container at room temperature for a day at most, but they are truly at their peak when enjoyed immediately. Enjoy this simple, healthy, and incredibly satisfying snack!
Conclusion:
And there you have it! My simple yet incredibly satisfying recipe for baked zucchini chips is a true game-changer when you’re craving a crispy, savory snack without all the guilt of traditional fried options. These chips are remarkably easy to make, requiring minimal ingredients and effort, making them perfect for a quick appetizer, a healthy lunchbox addition, or even a satisfying movie night treat. The natural mild flavor of zucchini lends itself beautifully to a variety of seasonings, allowing for endless customization. I truly hope you give these baked zucchini chips a try – you won’t regret ditching the store-bought versions for these homemade delights!
Enjoy these delightful chips on their own, or get creative with serving suggestions! They are fantastic alongside a creamy dip like hummus or ranch, or even crum extractbled over salads for an extra layer of texture. For variations, feel free to experiment with different spice blends. Smoked paprika adds a wonderful depth, a sprinkle of garlic powder and onion powder elevates the savory notes, and a touch of chili powder will bring a pleasant kick. Don’t be afraid to get adventurous with your seasonings to make these baked zucchini chips uniquely yours.
Frequently Asked Questions:
Can I make these chips ahead of time?
While they are best enjoyed fresh for maximum crispiness, you can bake them a few hours in advance. Store them in a single layer in an airtight container at room temperature. If they lose a bit of their crunch, a quick 5-10 minute warm-up in a low oven can revive them.
My zucchini chips aren’t crispy. What did I do wrong?
Several factors can contribute to less-than-crispy chips. Ensure your zucchini slices are thinly and evenly cut. Pat them very dry with paper towels to remove excess moisture before seasoning and baking. Also, make sure your oven temperature is accurate and that you’re not overcrowding the baking sheet, allowing for good air circulation.
Baked Zucchini Chips
Crispy and flavorful baked zucchini chips, a healthier alternative to traditional potato chips. Perfect for snacking or as a side dish.
Ingredients
-
2 medium zucchini, sliced into rounds (4-5 mm thickness)
-
1/4 cup olive oil
-
2/3 cup grated parmesan cheese
-
1/2 tsp garlic powder
-
1/4 tsp paprika
-
1/2 tsp salt
-
black pepper to taste
Instructions
-
Step 1
Preheat oven to 400°F (200°C). Line baking sheets with parchment paper. -
Step 2
In a large bowl, toss the zucchini slices with olive oil, ensuring each slice is lightly coated. -
Step 3
In a separate shallow dish, combine grated parmesan cheese, garlic powder, paprika, salt, and black pepper. -
Step 4
Dredge each zucchini slice in the cheese mixture, pressing gently to help the coating adhere. -
Step 5
Arrange the coated zucchini slices in a single layer on the prepared baking sheets. -
Step 6
Bake for 15-20 minutes, or until golden brown and crispy, flipping halfway through. -
Step 7
Let cool slightly before serving. Enjoy!
Important Information
Nutrition Facts (Per Serving)
It is important to consider this information as approximate and not to use it as definitive health advice.
Allergy Information
Please check ingredients for potential allergens and consult a health professional if in doubt.